
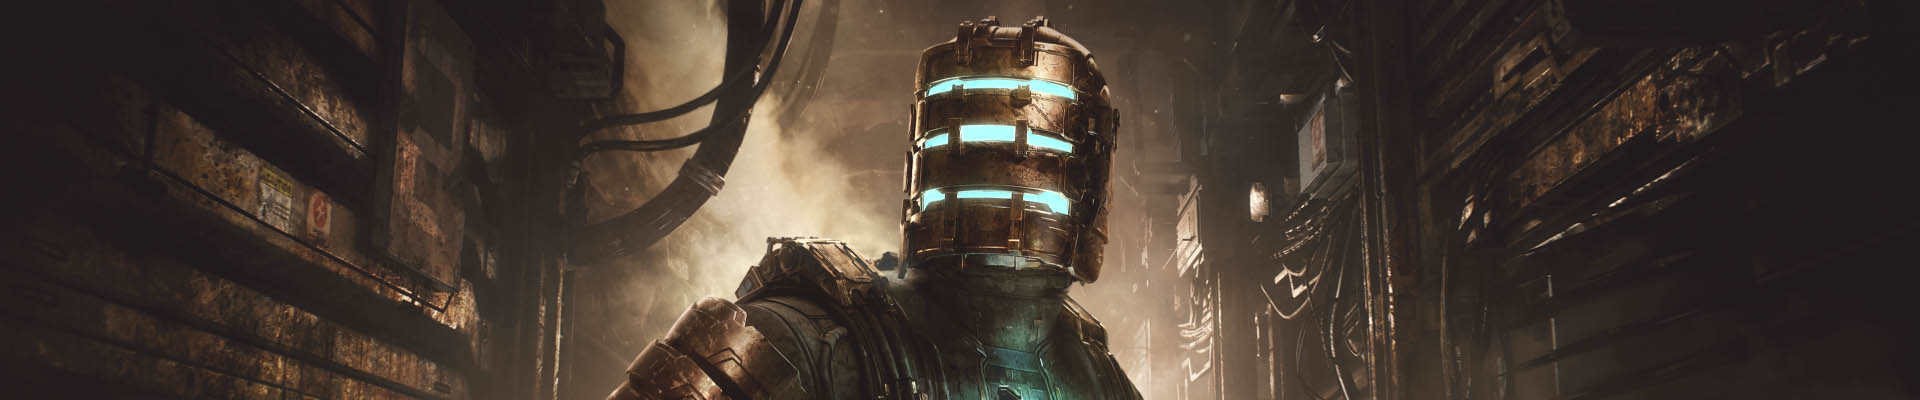
Dead Space Remake - All Collectibles
Chapter 1 (New Arrivals)
0:00 - Log 1 (Background Request)
0:45 - Log 2 (Sponsored Article: The USG Ishimura)
1:10 - Weapon 1 (Plasma Cutter)
2:15 - Log 4 (Send Help)
2:43 - Weapon 2 (Stasis Module), Log 6 (Stasis Door) - MISSABLE
3:57 - Node 1, Log 8 (Stasis Module Request)
4:40 - Log 9 (Autoloader) - MISSABLE
6:15 - Node 2
7:47 - Log 11 (Repair Invoice), Node 3, Log 12 (Poker Invitation)
11:11 - Node 4
12:10 - Suit Level 2
Details
Log 1 (Background Request)
As soon as you gain control of Isaac, head into the side room on your right (while in the ship) to find it on the ground.
Log 2 (Sponsored Article: The USG Ishimura)
Once you enter the USG Ishimura station, on your left (inside Flight Lounge).
Log 3 (Run!)
Story-related. Automatically as you run from the Necromorph enemies you encounter.
Weapon 1 (Plasma Cutter)
After going down the elevator, sitting on a bench in the Service Workshop. This is your first weapon, and if you aim for the trophy to beat the game only with Plasma Cutter, be carefull not to use any other weapon. Having only this weapon in your invetory gives only Plasma Cutter bullets - stick with that.
Log 4 (Send Help)
After defeating your first Necromorph enemy, go through a hallway and open the next door. The log is on the Security Phone directly in front of you.
Log 5 (Repair the Tram System)
Story-related. Automatically upon entering Tram Control Room.
Weapon 2 (Stasis Module)
From the Tram Control Room, take the right door. Go downstairs and the Stasis Module will be in front of a malfunctioning door, pick it up.
Log 6 (Stasis Door) - MISSABLE
After collecting the Stasis Module, stand in front of the door for about 30 seconds and Daniels will call you. If you use Statis on the doors and go past them, you will not get this log.
Log 7 (Dismemberment)
Story-related. Automatically upon entering Tram Repair Room.
Node 1)
Inside Tram Repair Room, check the wall near the entrance.
Log 8 (Stasis Module Request)
On a bench next to the Claw Control panel.
Log 9 (Autoloader) - MISSABLE
Connect the left claw arm to the tram first, then attempt to connect the right a few times but don’t uses Stasis on it before connecting it. Daniels will now call you to give you a hint how to connect the arms correctly. If you connect both claws successfully, you will miss the log.
Log 10 (Replaced the Tram Car)
Story-related. Automatically after replacing the tram.
Node 2
Backtrack to the Tram Control Room where you got Log 5 "Repair the Tram System". From the Tram Control Room, take the door to "Cargo and Baggage Hall". Enable the right circuit breaker at the end of the hall to unlock a room back down the hall. Turn around and backtrack through the hallway, then head into the room in which you router the power.
Log 11 (Repair Invoice)
Go back to the circuit breaker at the end of the hallway, reroute power to the Maintenance Bay and enter it. In Maintenance Bay use the elevator to get upstairs, the log is on a chair next to the next circuit breaker.
Node 3
After rerouting the power to the Maintenance Bay Office, use the same elevator you arrived in to get back to the lower floor. After exiting the elevator the office will be straight ahead and slightly to the left. Enter it to find the Node inside.
Log 12 (Poker Invitation)
On the shelf directly next to the above node.
Log 13 (Found the Data Board)
Story-related. Automatically after collecting the Data Board.
Log 14 (En Route to the Bridge)
Story-related. Automatically after calling the tram ride.
Node 4
After riding the elevator up, enter the supply room on your left as you go through the corridor. It's in the corner of the room.
Log 15 (Arrived on the Bridge)
Story-related. Automatically after entering Flight Lounge.
Log 16 (Go to Medical)
Story-related. Automatically after returning to the Kellion.
Suit Level 2
Purchase from Shop for 10,000 Credits. You can find a store after taking the elevator. You can sell extra items like sellable circuits if you have any, Statis replenish items, bullets if you have extra... Or simply collect more and buy from the next shop in the upcoming chapter.
Chapter 2
0:00 - Weapon 3 – Kinesis Module, Weapon 4 – Pulse Rifle
1:23 - Node 5
1:55 - Log 18 – Patient Harris
2:30 - Log 19 – Calculated Risks
4:02 - Schematics 1 – Pulse Rounds
4:45 - Pin to the Wall trophy
5:00 - Log 23 – Nicole’s Log & Side Mission 1 "Scientific Methods", Log 24, Log 25, Log 26
6:25 - Schematics 2 – Stasis Pack
6:45 - Log 27 – Vital Personnel
7:58 - Node 6
9:04 - Weapon Upgrade 1 - Cartridge Rack (Plasma Cutter)
9:25 - Side Mission 1 – Scientific Methods Step 1, Log 30 – Patient Observations
10:33 Log 31 – Nicole’s Study, Side Mission 1 – Scientific Methods Step 2
11:15 - Log 32, Node 7, Log 33
13:12 - Log 34 – Autopsy Report
13:48 - Security Clearance Level 1 (Node 8)
14:11 - Security Clearance Level 1 (Node 9)
Details
Weapon 3 (Kinesis Module)
Immediately in front of you at the beginning of the chapter.
Weapon 4 (Pulse Rifle)
After using Kinesis to move some obstacles, enter Medical Tram Station upstairs and get it from a dying security officer.
Log 17 (Destroy the Barricade)
Story-related. Automatically after entering Security Station.
Node 5
After going through Imaging Diagnostics, and inside Diagnostic Technician, check on a wall. Watch out for the enemy.
Log 18 (Patient Harris)
In Imaging Diagnostic, open the doors by enabling the left circuit breaker on "Doors", then head back to the other side of the room into Consultation Room. It's on the desk
Log 19 (Calculated Risks)
In Imaging Diagnostics, use the same circuit breaker from before and enable the right breaker for "Elevators". Then use the small elevator left of the circuit breaker, upstairs enter the next door and enter Observation Room. The log is on a medical bed.
Log 20 (Found a Hydrazine Tank)
Story-related. Automatically after collecting Hydrazine Tank.
Log 21 (Shook the Whole Ship)
Story-related. Automatically after you re-enter the vacuum space.
Log 22 (Almost Got Me)
Story-related. Automatically after descending down an elevator shaft.
Schematics 1 (Pulse Rounds)
After descending down an elevator shaft, check directly on your left after entering Coolant Pipelines.
Log 23 (Nicole’s Log & Side Mission 1 "Scientific Methods")
After clearing the quarantine in Main Lab, head inside Dr. N. Brennan’s office downstairs. It's on the desk.
Log 24 (Anonymized Transcript)
Check the shelf in the same office as where the Log 24 is.
Log 25 (Marker Discovery)
Inside Dr. T. Kyne’s office, which is across Dr. N. Brennan’s office, check the bench by the door.
Log 26 (They Defy Death Itself)
In the bathroom behind Dr. T. Kyne’s office, check on the floor in one of the cubicles.
Schematics 2 (Stasis PackV
Enter Main Lab Changing Room to the left of Dr. N: Brennan’s office, it's a bench on the right.
Log 27 (Vital Personnel)
On a desk in the corner of Biological Prosthetics Center, a room with some human pods.
Node 6
Take the elevator upstairs and go through the two doors inside Limb Stimulation Therapy, then check the wall.
Log 28 (Found a Shock Pad)
Story-related. Automatically after collecting Shock Pad in the Limb Simulation Therapy room.
Log 29 (Find the Captain’s Rig)
Story-related. Automatically after you blowing up the barricade.
Weapon Upgrade 1 - Cartridge Rack (Plasma Cutter)
After blowing up the barricade, enter Ishimura Clinic. Check the bench on the right side as soon as you enter.
Side Mission 1 (Scientific Methods Step 1)
Watch the hologram inside Emergency Room, it will activate when you get close to the middle bed. Make sure to watch the full sequence until the hologram disappears, otherwise you will fail to unlock the quest. After the hologram disappears, you can press "Play" on the back of the bed, to make sure you unlocked the quest.
Log 30 (Patient Observations)
Inside Emergency Room, sitting on a medical bed besides the one where you watched the holograms
Log 31 (Nicole’s Study, Side Mission 1 "Scientific Methods" Step 2
Inside Emergency Room, tilt the circuit breaker for the showers. Then use kinesis to move the wall revealing a hidden room with this log inside. Part of Side Mission "Scientific Methods". If you do this step before the above Step 1, it can bug out, so make sure you did the first step before.
Log 32 (Rats in the Walls)
Inside Emergency Room, disable both fuses to reveal the battery to the right, take out the battery with kinesis, place it at the door to ER Hallway A and defeat the enemies along the way. Go through ER Hallway A, find a log on a wall next to the entrance to Intensive Care Unit (blinking mail icon)
Log 33 (Colony’s Problems)
On the floor at the end of the same hallway right from the Log 32.
Node 7
On the wall at the end of the same hallway right from the Log 32.
Log 34 (Autopsy Report)
After using elevator and entering Morgue, found alongside the right side.
Log 35 (Transmitting Codes / Security Clearance Level 1)
Story-related. Automatically after collecting Captain’s Rig.
Log 36 (Go to Engineering)
Story-related. Automatically after ascending the elevator.
Security Clearance Level 1 (Node 8)
When you go back inside Ishimura Clinic where you got the Plasma Cutter upgrade, open the wall box with Security Clearance Level 1.
Security Clearance Level 1 (Node 9)
Before using the Tram, backtrack through Imaging Diagnostics Wing, Coolant Pipelines, Zero-G Therapy Access Corridor, fly up, and there’ll be Patient Locker Room on left. Requires Security Clearance Level 1.
Chapter 3
0:00 - Log 37 – It’s Min
0:30 - Voelker’s Rig (Item for Side Mission 2 "You Are Not Authorized")
1:22 - Log 38 – Growth
1:37 - Log 39 – Temple’s Log 01
2:08 - Weapon 5 – Ripper, Log 41 – His Own Teeth
3:00 - Side Mission 1 "Scientific Methods" Step 3
5:15 - Log 42 – Temple’s Log 02
6:37 - Node 10
7:15 - Weapon Upgrade 2, 3 - Heat Accumulator, Kinetic Autoloader
8:00 - Log 45 – Chaos
8:43 - Schematics 3 – Medium Med Pack
9:05 - Node 11, Log 46 – Rig Transcript
10:24 - Flamethrower, Log 49, Node 12
11:43 - Schematics 4 – Ripper Blades
12:58 - Node 13, Schematics 5 – Flamethrower Fuel
13:28 - Weapon Upgrade 5 – Gellified Hydrazine (Flamethrower)
Details
Log 37 (It’s Mine)
Check the lower floor on your right in Main Hangar Bay, it can be grabbed with Kinesis. It's few steps in when you enter the bay.
Voelker’s Rig (Item for Side Mission 2 "You Are Not Authorized")
From Main Hangar Bay enter Flight Deck, and check the upper left corner on the map, near the oxygen tank. The rig is floating below the body
Log 38 (Growth)
After arriving at Engineering, at the end of the first hallway.
Log 39 (Temple’s Log 01)
Check a seat in the Control Room, next to the Shop.
Log 40 (Engine Diagnostics)
Story-related. Automatically when interacting with the Diagnostic Report.
Weapon 5 (Ripper)
Head downstairs into Machine Shop and the Ripper will be on the ground in front of you.
Log 41 (His Own Teeth)
Enter the doors right next to the Ripper and it will be in front of you on the wall.
Side Mission 1 "Scientific Methods" Step 3
Come back in the room where the Ripper weapon was, and enter the doors on the other end of that room. Watch the recording until you quest log updates. If this room is locked, you must redo Step 1 and Step 2 of this quest.
Log 42 (Temple’s Log 02)
After crossing the gap to the southern part of Refueling Control Stations, find it on the knocked locker next to the locked room.
Log 43 (Kendra is Alive)
Story-related. Automatically after collecting Fuel Station Keycard.
Node 10
Inside Fuel Management. Requires Fuel Station Keycard (story-related) for access.
Weapon Upgrade 2 (Heat Accumulator (Plasma Cutter)
Purchase from Shop for 11,000 Credits. It will not appear until you visit weapon station and unlock your first upgrade for weapons.
Weapon Upgrade 3 "Kinetic Autoloader" (Pulse Rifle)
Purchase from Shop for 11,000 Credits.It will not appear until you visit weapon station and unlock your first upgrade for weapons.
Weapon Upgrade 4 "Ricochet Tracer" (Ripper)
Purchase from Shop for 11,000 Credits. It will not appear until you visit weapon station and unlock your first upgrade for weapons.
Log 44 (Engines are Refueled)
Story-related. Automatically after refueling both engines.
Log 45 (Chaos
After using an elevator and before entering Decontamination Room, check the open locker at the end of the hallway, next to an upgrade bench.
Schematics 3 (Medium Med Pack)
After going through the Decontamination Room quarantine, check the locker in front of you.
Node 11
From the last schematic go through the next door, go left, check at the very end of the hallway between some overgrown mucus
Log 46 (Rig Transcript)
From the previous location check the opposite end of the hallway, on the floor in front of a bloody hole, just before entering the Centrifuge.
Log 47 (Centrifuge is Online)
Story-related. Automatically after turning on the centrifuge.
Log 48 (They Found an Artifact)
Story-related. Automatically after returning to Control Room.
Weapon 6 (Flamethrower)
Stuck to a corpse on the wall in the hallway leading to Fuel Storage.
Log 49 (Temple’s Log 03)
In the small room, north on the map, next to the elevator in Fuel Storage.
Node 12
On the wall in the same room.
Schematics 4 (Ripper Blades)
After going down the first elevator, head inside the open room by the second elevator, check the box on your left.
Node 13
Inside the Engine Room, in a small room underneath the stairs.
Schematics 5 (Flamethrower Fuel)
Inside the Engine Room, next to the Primary Engine panel that you will need to activate (upstairs).
Log 50 (Go to the Bridge)
Story-related. Automatically after powering on the engine.
Log 51 (Nicole?)
Story-related. Automatically after approaching Control Room.
Weapon Upgrade 5 "Gellified Hydrazine" (Flamethrower)
Purchase from Shop for 11,500 Credits.
Chapter 4
0:00 - Log 53 – Bridge Attack
0:21 - Log 54 – Eckhardt’s Clearance, Log 55 – More Time
0:40 - Side Mission 2 "You Are Not Authorized", Security Clearance Level 2
1:20 - Log 56 – Shoot It In the Back (Missable), Node 14, Log 57
3:50 - Node 15
5:08 - Weapon 7 (Contact Beam)
5:55 - Log 59 – Tracking Infection, Node 16
7:09 - Log 60 – Mining Admin Rerouted (Semi-Story-Missable)
7:45 - Log 61 – Believers, Log 62 – Unitology Article
9:12 - Weapon Upgrade 6 "P.C.S.I Custom Magazine" (Pulse Rifle)
9:57 - Node 17
10:10 - Log 63 – Watch the Outlets (Semi-Story-Missable)
10:35 - Weapon Upgrade 7 "Supersymmetry Tether" (Contact Beam)
11:00 - Log 65 – Looking for Elizabeth
11:40 - Schematics 6 – Intermediate Engineer Rig
10:35 - Log 69 – Hold On ("Side Missions" category log)
12:53 - White’s Rig (Side Mission 2 "You Are Not Authorized" item)
Details
Log 52 (The Marker)
Story-related. Automatically after arriving at the Bridge Tram Station.
Log 53 (Bridge Attack)
When you reach Main Atrium, turn right to find this on the floor downstairs
Log 54 (Eckhardt’s Clearance)
Follow the main objective and you will reach Captain’s Nest. Check on the right.
Log 55 (More Time)
To the left of the previous log.
Side Mission 2 "You Are Not Authorized", Security Clearance Level 2
Interact with the console next to the logs in the same room. You will need to find all Rigs and return them here. You can’t find them all right away, we’ll pick them up in the remaining chapters and return here later. Save before the next encounter, there is a missable log on the enemy
Log 56 (Shoot It In the Back) (Missable)
After returning to the Main Atrium, you will encounter the first Brute. Avoid it for around 30 seconds and Hammond will call you. This is missable. If you attack it before the call, you will miss the log.
Node 14
Dropped by the Brute in Main Atrium.
Log 57 (Captain’s Fate)
Inside the Armory of the Security Room, the room where the Brute came from.
Node 15
Enter the Main Atrium elevator, go to Floor 2. This is inside the Storage Room near Mining Administration
Log 58 (Electrical Fault)
Story-related. Automatically as you approach Mining Administration.
Weapon 7 (Contact Beam)
On Floor 2, check the floor inside Records Office. Requires Security Clearance Level 2, which you should have at this point.
Log 59 (Tracking Infection)
After entering Mining Administration on Floor 2, turn right to go inside Admin Server Maintenance. Requires Security Clearance Level 2. In order to unlock the first door, head south on the map to the Main Fuses room and destroy the fuse on the wall to unlock it.
Node 16
On the wall in the same room.
Log 60 (Mining Admin Rerouted) (Semi-Story-Missable)
Story-related. Automatically after rerouting power from Mining Administration.
Log 60 / Log 63 / Log 67 cancel out each other (you can only get two out of three logs per playthrough. Whichever power on the corresponding floor you reroute last won’t give a log on this playthrough, you must get the missing one in New Game Plus. This guide will collect Logs 60 & 63 on this playthrough, and Log 67 in the NG+ run.
Log 61 (Believers)
Backtrack to the elevator and go to Floor 3. Inside Break Room you will get it automatically upon entering and looking at the LCD screen.
Log 62 (Unitology Article)
On a bench in the corner in the same room.
Weapon Upgrade 6 "P.C.S.I Custom Magazine" (Pulse Rifle)
Inside Electrical Systems Storage on a shelf, Floor 3. Stand by the broken window and use kinesis to move the boxes by the door, then shoot the fuse to unlock it.
Node 17
Dropped by the Brute in Electrical Systems.
Log 63 (Watch the Outlets) (Semi-Story-Missable)
Story-related. Automatically after rerouting power from Electrical Systems.
Log 60 / Log 63 / Log 67 cancel out each other (you can only get 2/3 logs per playthrough. Whichever power on the corresponding floor you reroute last won’t give a log, you must get the missing one in New Game Plus. This guide will collect Logs 60 & 63 on this playthrough, and Log 67 in the NG+ run.
Log 64 (Med-Sci Reports)
Story-related. Automatically as you head back to the elevator.
Weapon Upgrade 7 "Supersymmetry Tether" (Contact Beam)
Purchase from Shop for 12,000 Credits. Take doors from Main Atrium to The Crew Deck to find Shop.
Log 65 (Looking for Elizabeth)
Enter the second elevator in Main Atrium to Water Purification. Check the floor after exiting the elevator.
Log 66 (Manual Targeting?)
Story-related. Automatically after having cleared all 3 rerouting power objectives.
Log 67 (Water Purification) (Semi-Story-Missable)
Story-related. Automatically after rerouting power from Water Purification (unavailable on this playthrough, you can get it in New Game+ by rerouting power to Water Purification first).
Log 60 / Log 63 / Log 67 cancel out each other (you can only get 2/3 logs per playthrough. Whichever power on the corresponding floor you reroute last won’t give a log, you must get the missing one in New Game Plus. This guide will collect Logs 60 & 63 on this playthrough, and Log 67 in the NG+ run.
Schematics 6 (Intermediate Engineer Rig)
Inside EVA Prep Room, on your right side on the way to the ADS Cannons.
Log 68 (Sync the ADS Cannons)
Story-related. Automatically after going up the elevator.
Log 69 (Hold On) ("Side Missions" category log)
Immediately after the previous story log, on the wall next to the save station. This gets added under the "Side Missions" logs in your inventory, not under Chapter 4 logs.
White’s Rig (Side Mission 2 "You Are Not Authorized" item)
At the end of the ADS section, after the last computer screen, floating on a ledge to the left.
Chapter 5
0:00 - Suit Level 3
1:02 - Log 72 – Mercer’s Volunteer
3:28 - Schematics 7 (Line Racks), Node 18
4:25 - Node 19
5:00 - Log 75-78, Node 20, Weapon 8 (Line Gun)
7:39 - Weapon Upgrade 8 "Ionized Capacitor" (Line Gun)
Details
Suit Level 3
Purchase from Shop for 20,000 Credits if you have Intermediate Engineer Rig schematics.
Log 70 (Follow Nicole’s Signal)
Story-related. Automatically after arriving at Medical Tram Station.
Log 71 (Locked In)
Story-related. Automatically after entering Security Station.
Log 72 (Mercer’s Volunteer)
Inside Observation Room, take the elevator upstairs from Imaging Diagnostics, get rid of the mucus and enter the room on the south.
Schematics 7 (Line Racks)
Don't go down the elevator, go through the next door. On the right is Dr. B. Warwick’s office, it requires Security Clearance Level 2. Check the desk.
Node 18
On the wall in the same room.
Node 19
Immediately in front of you on the wall, after going down the elevator to Chemical Lab.
Log 73 (Open the Door!)
Story-related. Automatically after being locked inside Chemical Lab.
Log 74 (Hunted)
Story-related. Automatically after escaping from the creature.
Log 75 (Dr. Kyne’s Dementia)
After escaping the red regenerating creature for a second time, check on a a hospital bed in ER Hallway A, outside Emergency Equipment Storage.
Weapon 8 (Line Gun)
To the immediate right of the last log, enter the Security Clearance Level 2 door to Emergency Equipment Storage
Node 20
On the back wall in the same room.
Log 76 (Sterile Instruments)
On a hospital bed in ER Hallway B, outside door leading back to Emergency Room.
Log 77 (Harris’s Choice)
Check on a desk in the back corner of Intensive Care Unit.
Log 78 (Mercer’s Journal)
Check on a desk inside Dr. C. Mercer’s office.
Log 79 (Our Air Supply)
Story-related. Automatically after speaking to the man in Dr. C. Mercer’s office.
Log 80 (Get to Cryogenics)
Story-related. Automatically after re-enabling life support.
Weapon Upgrade 8 "Ionized Capacitor" (Line Gun)
Purchase from Shop for 11,500 Credits.
Log 81 (Go to Hydroponics)
Story-related. Automatically after cryogenically freezing the Hunter.
Chapter 6
0:00 - Node 21
10:20 - Node 22
11:35 - Log 85 – Cross’s Log 01
12:05 - Log 86 – Go to Food Storage (Missable - cancells Log 87)
12:44 - Weapon Upgrade 9 "Angled Launcher" (Ripper)
13:15 - Log 89 – Cross’s Log 02, Weapon 9 (Force Gun)
13:47 - Log 90 – Use the Enzyme (Missable)
14:10 - Log 92 – Corruption
15:12 - Weapon Upgrade 10 "Subsonic Oscillator" (Force Gun)
15:40 - Node 23
15:55 - Holt’s Rig (Side Mission 2 "You Are Not Authorized" item)
17:00 - Node 24
17:15 - Log 95 – Cross’s Log 03
18:34 - Node 25
18:48 - Schematics 8 (Force Energy)
19:05 - Log 97 – Technical Manual, Node 26
Details
Log 82 (Hydroponics Access)
Story-related. Automatically at the beginning of the chapter.
Node 21
On the wall in the hallway next to Cryogenics Control Room, after the scenes you can enter it.
Log 83 (A Tissue Sample, under "Side Missions" logs), Side Mission 3 "Premeditated Malpractice"
Grab the Tissue Sample from inside the Cryogenic Chamber.
Side Mission 3 (Premeditated Malpractice Step 1+2)
Before continuing forward, track the new side mission, press R3 to see the path, and complete the first two steps (scan the tissue sample in Main Lab and watch the recording in Intensive Care Unit).
Node 22
Go to tram station and take the tram to "Hangar-Cargo-Tram Control". Enter the left door, take a left, and enter Tramway Storage Room. Requires Security Clearance Level 1.
Log 84 (Find a Workstation)
Story-related. Automatically as you approach Hydroponics Tram Station.
Log 85 (Cross’s Log 01)
Check on the bench in front of you upon entering Hydroponics Tram Station.
Log 86 (Go to Food Storage) (Missable - cancells Log 87)
In Hydroponics Central Hub, you get this via a call if you craft the Enzyme Syringe first in the "Hydroponics Central Hub" before entering "Food Storage". Cancels out the next log "Inject the Wheezers" (do the opposite in New Game Plus to get it).
Log 87 (Inject the Wheezers) (Missable - cancells Log 86)
In Hydroponics Central Hub, you get this via a call if you DO NOT craft the Enzyme Syringe in the "Hydroponics Central Hub". Ignore it, and instead go to "Food Storage". Reach the very end of Food Storage where there’s a locked door, then you get a lengthy video call which automatically gives Log 88 "The Leviathan". After this backtrack to Hydroponics Central Hub and craft the Enzyme Syringe to get this log.
Log 88 (The Leviathan)
Story-related. Automatically as you approach Food Storage
Weapon Upgrade 9 "Angled Launcher" (Ripper)
On the desk inside B. Andonov’s office (the first room on the left in Flow Control).
Log 89 (Cross’s Log 02)
Check the wall of West Grow Chamber, outside West Seedling Room B.
Weapon 9 (Force Gun)
Inside West Seedling Room A. Requires Security Clearance Level 2.
Log 90 (Use the Enzyme) (Missable)
When entering West Seeding Room B and before you inject Wheezer 01, shoot it to receive a call. If you inject a Wheezer before trying to shoot, you won’t receive this log.
Log 91 (Jacob and Nicole)
Story-related. Automatically after injecting Wheezer 01 and clearing out the Necromorphs.
Log 92 (Corruption)
Take the lift to Floor 03 (Floor 4 on the map). On the desk inside Dr. E. Cross’s office with Wheezer 02.
Weapon Upgrade 10 "Subsonic Oscillator" (Force Gun)
Purchase from Shop for 12,000 Credits. There is one on Floor 2 when going through the south door.
Node 23
On the wall in front of you upon entering Refrigeration Tower. It's the big one where you can fly
Log 93 (Help Me…)
Story-related. Automatically upon entering Hydroponics Control, where Wheezer 04 is located.
Log 94 (Ghosts on the Monitor)
Story-related. Automatically upon entering East Grow Chamber.
Holt’s Rig (Side Mission 2 "You Are Not Authorized" item)
Upon entering East Grow Chamber, destroy the mucus nodes in the middle to reveal the rig on the ground behind the elevator.
Node 24
Dropped by the Brute in East Grow Chamber ground floor.
Log 95 (Cross’s Log 03)
On the gantry at the top of East Grow Chamber, near Wheezer 06.
Log 96 (Corporate Assholes)
Story-related. Automatically after leaving Air Filtration Hall, where you get grabbed by a tentacle.
Node 25
On the wall in front of you upon entering Air Filtration Tower.
Schematics 8 (Force Energy)
Inside an alcove in Air Filtration Tower, after the first electricity trap, in on of the side-rooms.
Log 97 (Technical Manual)
Inside Annex Control Room, accessible after passing through the fire rooms and using the lift. It's the middle room.
Node 26
On the wall in the same room.
Log 98 (I Need You)
Story-related. Automatically upon returning to East Seedling Room B for Wheezer 08.
Log 99 (Space the Leviathan)
Story-related. Automatically upon injecting all Wheezers.
Log 100 (Bad Ideas)
Story-related. Automatically upon entering Food Storage airlock.
Log 101 (Finish It Off!)
Story-related. Automatically halfway through the Leviathan fight.
Log 102 (Head Back Inside)
Story-related. Automatically after defeating Leviathan.
Log 103 (The SOS Beacon)
Story-related. Automatically upon re-entering Food Storage airlock.
Log 104 (Go to the Mining Deck)
Same as Log 103.
Chapter 7
0:00 - Node 27
0:20 - Log 107 – Ore Storage Report (Side Missions), Side Mission 3 "Premeditated Malpractice" Step 3
1:34 - Log 108 – Miner’s Log
1:50 - Log 109 – Mining Progress
2:04 - Log 111 – Dr. Kyne’s Hostage, Node 28, Schematics 9 (Contact Energy)
3:04 - Log 113 – Supervisor’s Choice
3:46 - Log 116-117, Side Mission 1 "Scientific Methods" Step 4
4:48 - Schematics 10 (Intermediate Miner Rig)
5:40 - Node 29, Weapon Upgrade 11, Node 30
7:10 - Suit Level 4
7:55 - Node 31
Details
Log 105 (Hammond’s Return)
Story-related. Automatically upon entering Mining Deck.
Node 27
Follow the hall into the large area of the room and move some crates stacked on the wall to reveal it.
Log 106 (Weird Malfunctions)
Story-related. Automatically after going down elevator.
Log 107 (Ore Storage Report, under Side Missions), Side Mission 3 "Premeditated Malpractice" Step 3
On Deck C, block laser traps with kinesis crates and continue to the end of hallway, and enter Ore Storage. Move the crates in the corner and grab the log on the wall
Log 108 (Miner’s Log)
In Extraction Area, check the eastern room on the south, on a table next to the workbench.
Log 109 (Mining Progress)
After riding the elevator, check on a desk in front of you upon entering Mining Control.
Log 110 (Launch Tubes Sealed)
Story-related. Automatically after attempting to launch the tube.
Log 111 (Dr. Kyne’s Hostage)
In Deck B: Processing. It's next to a save point on the other side of the area on the wall.
Node 28
Left of the log is a locked door. Go to the broken window on the side andshoot the door fuse. Node is inside this room.
Schematics 9 (Contact Energy)
On a coffee table in the same room.
Log 112 (Fail-Safes)
Story-related. Automatically upon stepping into Processing Chamber.
Log 113 (Supervisor’s Choice)
After returning gravity in the big room, head into Mineral Processing Control. This log is on a desk.
Security Clearance Level 3 (Dalla’s Rig)
Story-related. Automatically after collecting Dallas’s Rig.
Log 114 (Found the Admin’s Rig)
Story-related. Automatically after leaving Mineral Processing Control.
Log 115 (Through the Vents)
Story-related. Automatically when riding elevator to Deck D: Maintenance.
Log 116 (Nicole and Dr. Kyne, unders Side Missions), Side Mission 1 "Scientific Methods" Step 4
Head through to Equipment Supply on the west of this area. Set the circuit breaker to "Storage 02" and enter the room to find it on the floor. Part of Side Mission 1 (Scientific Methods.
Log 117 (Thank You, Isaac, under Side Missions)
On the desk in the same room.
Schematics 10 (Intermediate Miner Rig)
After defending Nicole from the enemies, enter Equipment Workshop. Check on a desk.
Log 118 (Found the SOS Beacon)
Story-related. Automatically after collecting SOS Beacon.
Node 29
After going up the small elevator, go out and turn around. Check the wall.
Weapon Upgrade 11 "Macroliter Fuel Tank" (Flamethrower)
Change circuit breaker to zero gravity, fly down to the floor below. Enter Utility Room on the side to find it on the floor. Requires Security Clearance Level 3.
Node 30
In the same room as the weapon upgrade.
Suit Level 4
Purchase from Shop for 35,000 Credits. Requires Intermediate Miner Rig schematics.
Node 31
On Deck C: Mining (Floor 4), inside Storage Room, just before Mining Control. Ride the elevator up and enter the room
Log 119 (Launch the Asteroid)
Story-related. Automatically after loading SOS Beacon.
Log 120 (Gravity Tethers)
Story-related. Automatically after entering Mining Bay.
Log 121 (Beacon is Away)
Story-related. Automatically after launching the asteroid.
Log 122 (Manual Override)
Story-related. Automatically when attacked by the Hunter.
Log 123 (Go to Communications)
Story-related. Automatically after boarding the mining elevator.
Chapter 8
0:00 - Rousseau’s Rig (Side Mission 2 "You Are Not Authorized" item), Log 127
2:20 - Schematics 11 (Oxygen Tank), Node 34
4:25 - Side Mission 1 "Premeditated Malpractice" Step 4
5:25 - Log 130 – Comm Array Error
6:15 - Log 131 – Mayday, Bailey’s Rig (Side Mission 2 "You Are Not Authorized" item)
6:50 - Communications Array solution
7:05 - Node 35
7:20 - Log 135 – The Comms Relay Crew
7:40 - Weapon Upgrade 12 "Weighted Blades" (Plasma Cutter)
8:01 - Node 36
Details
Rousseau’s Rig (Side Mission 2 "You Are Not Authorized" item)
Before you continue the story, head through the tram into Engineering and visit Fuel Storage. On the top floor, enter the locked room to find the rig. Requires Security Clearance Level 3.
Log 127 (Chief Engineer’s Log, under Side Missions)
Check behind the rig in the same room.
Schematics 11 (Oxygen Tank)
Go to Refueling Control Stations on Floor 4, and enter the locked storage room. Check the table. Requires Security Clearance Level 2.
Node 34
On the back wall in the same room. After this one you can continue to follow the story.
Log 128 (Chance for Rescue)
Story-related. Automatically upon arriving at Bridge Tram Station.
Log 129 (Eavesdropper)
Story-related. Automatically after the quarantine in Main Atrium.
Side Mission 1 "Premeditated Malpractice" Step 4
After entering the Main Atrium room, interact with the panel on the right side and watch the recording until the end. You can also re-watch it.
Log 130 (Comm Array Error)
In Comms Control Room, approach the north control panel and Daniels will call you.
Log 131 (Mayday)
Enter E. Bailey’s office next to the save station from the Comms Control Room. Check the desk.
Bailey’s Rig (Side Mission 2 "You Are Not Authorized" item)
Same room, just on the second desk inside the office, next to the corpse.
Log 132 (Open a Channel)
Story-related. Automatically after completing Communications Array puzzle.
Log 133 (First Contact)
Story-related. Automatically after interacting with Communication Control.
Log 134 (Hit the Manual Release)
Story-related. Automatically after interacting with Communication Control.
Communications Array solution
Use Kinesis to pull the connectors and connect them properly to reach the middle from any direction
Node 35
Immediately on your left after accessing Maintenance Gondola, which you enter after returning back and moving the movable boxes.
Log 135 (The Comms Relay Crew)
Check the bench in front of you after riding the gondola.
Weapon Upgrade 12 "Weighted Blades" (Plasma Cutter)
Check on a seat inside Maintenance Locker Room.
Node 36
After going down the elevator, on the wall at the end of the hallway.
Log 136 (Big Problems)
Story-related. Automatically after attempting to deploy the antenna.
Log 137 (Deploy the Antenna)
Story-related. Automatically after defeating the Leviathan Remnant.
Log 138 (Collision Imminent)
Story-related. Automatically after deploying the antenna.
Log 139 (No Survivors)
Story-related. Same as the log above.
Log 140 (Get to the Valor)
Story-related. Same as the log above.
Log 141 (Hammond on the Bridge)
Story-related. Automatically as you approach the USM Valor.
Chapter 9
You can't return to this part anymore, so everything in this chapter is missable!
0:00 - Log 144, Log 145, Node 37
0:40 - Front Toward Enemy trophy, Node 38
2:50 - Schematics 12 (Large Med Pack) - Merchant Trophy
3:05 - Node 39
3:15 - Node 40
Details
You can't return to this part anymore, so everything in this chapter is missable!
Log 142 (Eject the Warhead)
Story-related. Automatically upon entering Barracks in the USM Valor.
Log 143 (Transformed Soldiers)
Story-related. Automatically after defeating the first Stasis Necromorph.
Log 144 (Orders)
Head inside the Briefing Room at the end of the hall. The log can be found on the table in the middle of the room.
Log 145 (Alien Boarders)
In the same room, on a corpse near the second door.
Node 37
Head through the second door back to the airlock and check the wall. You can see this before entering the Briefing room
Log 146 (Dr. Kyne)
Story-related. Automatically as you ascend the elevator.
Log 147 (Why Bring a Nuke?)
Story-related. Automatically after ejecting the warhead.
Front Toward Enemy trophy
Enter the Shooting Range and interact with the panel to start it. Just kill all that moves for this trophy.
Node 38
Inside one of the lockers in the Shooting Range after surviving the fight
Schematics 12 (Large Med Pack) - Merchant Trophy
Enter the Infirmary, check the desk left of the entrance before the spinning lasers.
Log 148 (He’s Alive)
Story-related. Automatically after leaving the Infirmary.
Node 39
Dropped by Brute in Cargo Bay.
Log 149 (Dead on Arrival)
Story-related. Automatically as you go to leave the Cargo Bay.
Node 40
In Engine Room, at the end of the first hallway. You can turn on the fire suppression system first then come back to pick it up, or stack the boxes.
Log 150 (Go! Go!)
Story-related. Automatically after collecting Singularity Core.
Log 151 (Go to the Crew Deck)
Story-related. Automatically after escaping the USM Valor.
Chapter 10
0:00 - Benson’s Rig (Side Mission 2 "You Are Not Authorized" item)
1:08 - Side Mission 2 "You Are Not Authorized" Completion, Full Clearance trophy, Security Clearance
Master Override Master Override, Security locked doors 1-3 Cleanup
1:53 - Weapon Upgrade 13 "High-Yield Grenades" (Pulse Rifle), Node 41
2:45 - Weapon Upgrade 14 "Precision Lasers" (Line Gun), Node 42
4:55 - Node 43, Log 152, Side Mission 1 "Premeditated Malpractice" Step 5, Final Regeneration trophy, Weapon 10 (Prototype Stasis Module)
7:20 - Weapon Upgrade 15 "Diffraction Module" (Contact Beam)
8:03 - Weapon Upgrade 16 "Carbon-Fiber Blades" (Ripper)
8:55 - Weapon Upgrade 17 "Portable Heliotron" (Contact Beam)
11:18 - Weapon Upgrade 18 "Photon Energizer" (Line Gun)
Continue with the story
13:10 - Schematics 13 (Advanced Engineering Rig), Log 154
13:38 - Z-Baller trophy, Node 44
18:25 - Suit Level 5
19:10 - Node 45
19:45 - Log 155 – Thank You Doctor, Node 46
21:03 - Weapon Upgrade 19 "Gravitic Amplifier", Side Mission 1 "Scientific Methods" End, Whole Again trophy
26:15 - Weapon Upgrade 20 "High-Pressure Nozzle" (Flamethrower)
27:05 - Log 157 – More than Sacrifices
27:30 - Log 158, Log 159, Log 160
28:40 - Node 47
29:30 - Log 161 – Nexus Organism
30:12 - Node 48
Details
Benson’s Rig (Side Mission 2 "You Are Not Authorized" item)
Head through the Crew Deck door to the Tram Tunnel, and go under the stairs. Check the ground. This should be your last one.
Side Mission 2 "You Are Not Authorized" Completion, Full Clearance trophy, Security Clearance Master Override
Return to the Captain’s Nest under the Main Atrium. Use all of the Rigs on the Bridge Security console to create the Master Override, which is used to access a lot of good stuff.
Master Override, Security locked doors 1-3 Cleanup
Weapon Upgrade 13 "High-Yield Grenades" (Pulse Rifle)
Head back to the Main Atrium and take the elevator to Water Purification. Open the Master Override door and check inside the locker
Node 41
On the back wall in the same room.
Weapon Upgrade 14 "Precision Lasers" (Line Gun)
Take the tram to Hydroponics station. In here, open the Master Override chest in the hallway between Hydroponics Central Hub and the Mining Tram Station.
Node 42
Head through Flow Control and enter Rare Specimens (Security Level 3). Check the wall, as usual.
Node 43
Head up the elevator into West Grow Chamber, then take that elevator to Floor 2 (Map Floor 3). Head through to Nutrition Systems. This opens if you did all previous steps for this quest. Check the room for Node
Log 152 (Working Discreetly (Side Missions), Side Mission 1 "Premeditated Malpractice" Step 5, Final Regeneration trophy
Continue through to Diagnostic Lab. The log will be on the desk, which will complete the Premeditated Malpractice side mission.
Weapon 10 (Prototype Stasis Module)
Sitting on a desk inside the same room. This will upgrade your stasis, making it stronger.
Weapon Upgrade 15 "Diffraction Module" (Contact Beam)
Head to Mining Deck and use kinesis to move the sliding boxes to create a path to Tools Storage. Inside will be a Master Override chest containing the upgrade.
Weapon Upgrade 16 "Carbon-Fiber Blades" (Ripper)
Head through the Tram Station to Engineering, then head through the Preparation Room down to Machine Shop. You can find another Master Override chest here in the back.
Weapon Upgrade 17 "Portable Heliotron" (Contact Beam)
Head to Medical and go down to Main Lab. Head through to the back hallway and open Bioprosthetics Locker Room with Security Level 3.
Weapon Upgrade 18 "Photon Energizer" (Line Gun)
Head to the hallway between Chemical Lab and Cryogenics, where you’ll find Lab Storage locked with Security Level 3. Check inside the crate.
Now that you have everything, continue with the story.
Log 153 (The Marker is Active)
Story-related. Automatically after arriving at Crew Deck Tram Station.
Schematics 13 (Advanced Engineering Rig)
On a bench inside Standard Bathrooms of Crew Quarters.
Log 154 (Z-Ball Rules)
On a chair in the cafeteria, in the next room.
Z-Baller trophy
Complete all 6 levels of Z-Ball (collect 220 points). Use kinesis to grab and throw balls into the goals. Doing so will give you 5 points, or 10 points if that goal is glowing. Kill Necromorphs when you first attempt this, and then restart until you complete it.
Node 44
After completing level 6 of Z-Ball, you can open Locker 6 in the cafeteria. That one has Node.
Suit Level 5
Purchase from Shop for 60,000 Credits. Requires Advanced Engineering Rig schematics.
Node 45
At the end of the hallway after going through Mess Hall.
Log 155 (Thank You Doctor)
Inside Standard Quarters, check the beds on the right.
Node 46
Inside Storage Room past Standard Quarters, on the wall.
Log 156 (Get to the Shuttle)
Story-related. Automatically as you go towards Deluxe Quarters.
Weapon Upgrade 19 "Gravitic Amplifier" (Force Gun)
In Deluxe Quarters, head inside Guest Consultant’s Suites. After the conversation, head into the back room to find this on a table. You will need to be on the final step of Scientific Methods side mission for this room to be accessible.
Side Mission 1 "Scientific Methods" End, Whole Again trophy
In the same room, play the recording in the last room. This will complete the Scientific Methods side mission and unlock the trophy
Weapon Upgrade 20 "High-Pressure Nozzle" (Flamethrower)
Grab the battery from Deluxe Quiet Bunks and place it in the circuit breaker by the bathrooms. Enable the doors, then head into the Deluxe Shift Bunks (south room). Inside will be a Master Override chest containing the upgrade.
Log 157 (More than Sacrifices)
Head towards Executive Quarters. In the first room there will be a log on the floor as you enter.
Log 158 (Planetary Mining An Investor’s Guide)
On the floor in Executive Quarters.
Log 159 (Eternal Rest)
On a shelf in the corner of Lt Commander V. Holt’s room (On map it's labeled as Captain B. Mathius).
Log 160 (White’s List)
Immediately to your left as you enter Second Officer J. Chic’s room (On map it's labeled as First Officer D. White).
Node 47
Grab the Exec Quarters Keycard from within the Executive Bathrooms, then use that to access First Officer D. Shoot the fuse on the wall, then enter Captain B. Mathius’s room. Check the wall.
Log 161 (Nexus Organism)
Inside Inquiry Desks, which you can access after the scenes.
Log 162 (Mercer is Close)
Story-related. Automatically after loading the Marker.
Node 48
On the wall on the left after going through the doors that opens upon loading the Marker, after some enemy ecounters.
Log 163 (Retrieve the Marker)
Story-related. Automatically after defeating the Hunter.
Chapter 11
0:00 - There’s Always Peng! trophy
0:35 - Weapon Upgrade 21 "Suspension Module", Log 165, Node 49
1:18 - Node 50
2:00 - Node 51
2:22 - POINT OF NO RETURN
Details
Log 164 (Get to Cargo)
Story-related. Automatically as you board the tram.
There’s Always Peng! trophy
In Cargo Bay when you descent the elevator, turn around, remove the crates blocking a locker, and open the locker to find Peng statue (you can sell it).
Weapon Upgrade 21 "Suspension Module" (Force Gun)
In Cargo Bay, inside a Master Override chest in the middle of the westerten part of the area.
Log 165 (Last Word)
South from the previous chest, few steps further in the corner.
Node 49
Check the wall next to the log, in the southwestern corner of the room.
Log 166 (Wish Me Luck)
Story-related. Automatically after moving the Marker through Cargo Bay.
Log 167 (He’s Here)
Story-related. Automatically when you get in the elevator to Flight Deck.
Log 168 (Arrival)
Story-related. Automatically as you enter Main Hangar Bay.
Log 169 (Loading Procedure)
Story-related. Automatically as you enter Main Hangar Bay.
Node 50
In Main Hangar Bay when you activate Zero Gravity, check the wall next to the Marker's starting point.
Log 170 (Safety First)
Story-related. Automatically after moving the Marker under the shuttle.
Log 171 (Let Him In)
Story-related. Automatically after restoring gravity.
Log 172 (Betrayal)
Story-related. Automatically after going to the shuttle.
Log 173 (Nicole’s Return)
Story-related. Automatically after going to the shuttle.
Node 51
On the wall to your right as you enter Flight Control Center.
Log 174 (We Lost Her)
Story-related. Automatically after recalling the shuttle.
POINT OF NO RETURN
Boarding the Shuttle is the Point of No Return. The game will warn you about it, so if you have any business before that, do what you miss at this point.
Chapter 12
0:00 - Node 52
0:20 - Log 175 (Retrieval Order)
0:55 - Node 53, Log 176 (They Left Us)
1:45 - Node 54
2:02 - Node 55-57
2:18 - Node 58
2:57 - Log 182 (Recombination Study)
3:30 - Node 59
3:42 - Hive Mind boss using Plasma Cutter only (One gun trophy)
11:05 - New Game Plus
Details
Node 52
In the northeast corner of Main Landing Pad.
Log 175 (Retrieval Order)
On the floor inside Living Quarters, in front of the shop.
Node 53
On the wall in the Landing Pad Atrium.
Log 176 (They Left Us)
On the floor in the corner of the Landing Pad Atrium.
Log 177 (There’s A Dead Space)
Story-related. Automatically after defeating the enemies in Server Room.
Log 178 (Do You Miss Them?)
Story-related. Automatically after defeating the enemies in the Supply Depot area.
Node 54
On the wall in Holding Zone 2B.
Log 179 (Groundside Tether)
Story-related. Automatically as you move the Marker to Transfer Junction.
Node 55-57
Inside a Master Override chest in Transfer Junction, on the other side of the room.
Log 180 (Power is Restored)
Story-related. Automatically after restarting Tether Control.
Node 58
Dropped by Brute in Transfer Junction.
Log 181 (Return the Marker!)
Story-related. Automatically as you arrive at the Extraction Site.
Log 182 (Recombination Study)
On the floor where you destroy the third tentacle on the south.
Log 183 (Nicole’s Farewell)
Story-related. Automatically after placing the Marker on its pedestal.
Node 59
On the wall after going through the Access Tunnel hallway.
Hive Mind boss using Plasma Cutter only (One gun trophy)
I had 200+ bullets, couple of Large Medkits and that is it. It's really easy on Medium, and this playthrough being the first one was reserved for Plasma Cutter only run.
New Game Plus
By completing the game you will be rewarded with the following items for use in NG+:
- 10 Nodes
- 50,000 Credits
- 5 Logs (falls under Side Missions logs), Logs 184-188
- Advanced Soldier Rig (Suit Level 6 Schematics). You can purchase the upgrade in NG+ for 99,000 Credits
If you completed the game on Impossible (which is great if you did), you will unlock:
- Burnished Suit
- Hand Cannon
New Game Plus contains 12 Marker Fragments, which must be collected in order to witness the new alternative ending. There will be one in every chapter, although Chapters 5 and 10 have 2 each, and Chapters 9 and 12 won’t have a fragment. Everything will carry over to New Game Plus, so if you missed anything, you can collect it during this playthrough.
Game Review
Latest Trophy Guides
Latest Reviews
Leave a comment
Please Log in to leave a commentComments
No comments available!