

Topics
Elden Ring - Game Progression Route
This guide will propose the optimal route through the game while thinking about trophies and missables along the way. Be aware that this guide covers only pointers to where to go and what to do, and some details about them - not everything in depth. For that, you can check other topic on this site to get info you might need.
Tutorial
Welcome Tarnished! Create your character and of you go onto the adventure. First area where you start is hard to pass without dying, so don't worry when that happens. You can revisit this area later in the game, and this is indended to be like this.
You will then start in a cave where you learn some game mechanics, and while in the first dungeon, you can find Tarnished's Wizened Finger inside the church where you start (it's for leaving the white messages on the floor). When you progress a bit you will find Finger Severer and Tarnished's Furled Finger next to an Imp statue. Those imp statues are Stonesword Key Doors, and you need Stonesword Key or multiple keys to enter the doors in fog (usually you can buy them from merchants or find through most of the dungeons.
Tarnished's Furled Finger is used to leave a orange sing on the floor, which means that if you don't set password, others can summon you while playing online. If you want to play with someone from your friends list, just set some online password in Multiplayer options from game's menu and do the same. The one that will summons you needs to use Furlcarling Finger Remedy beforehand.
You can find the "hidden" path in this area, just fall down next to the ghost in the chair (which is next to the golden tree inside). At the end you can find Strength! gesture.
Eventually, you will exit on the world map of Elden Ring. This is where the fun starts as you can go wherever you want, which is a lot to take in. Some areas are optional (a lot of them!), but you can get pretty awesome weapons and rewards from them, so you might consider completing them in between the story dungeons. Next to the first NPC, on the right, you can find Small Golden Effigy.
NPC's and Questlines
There are many NPC's in the game which have their own questlines. When you exit the first dungeon you can find White-Faced Varre standing next to the Site of Grace. Sites of Graces are like bonfires - travel points all over the world which resets enemies (minus the bosses and mini-bosses), refills your flasks, heals you, etc. Activate it by interracting with it.
When you beat a certain boss and progress through the story, some NPC's will move from their starting point and possibly you can miss a lof of their questlines. If you want to get things done, make sure to always talk with them, do what they need and progress what you want to progress. You don't even have to do them except for Fia and Renni (which I will cover in this guide).
Limgrave
Elden Ring - Limgrave Optional Dungeons
I suggest you check the above topic and see what you want to get from the weapons and equipment. Golden Seeds will raise your Flask uses, Sacred Seeds will increase the amount that you heal using the flask. You can adjust the number of HP and MP heals on Site of Graces (bonfires, yellow fires on the map and inside the dungeons), and you will level up there as well.
Start with collecting the map so it reveals your Limgrave West area. If you check on your map, you can always find the map on the world map easy by following the icon displaying it:
![]()
Just a step before there is a Church of Elleh just north from the point where you exit the first dungeon.
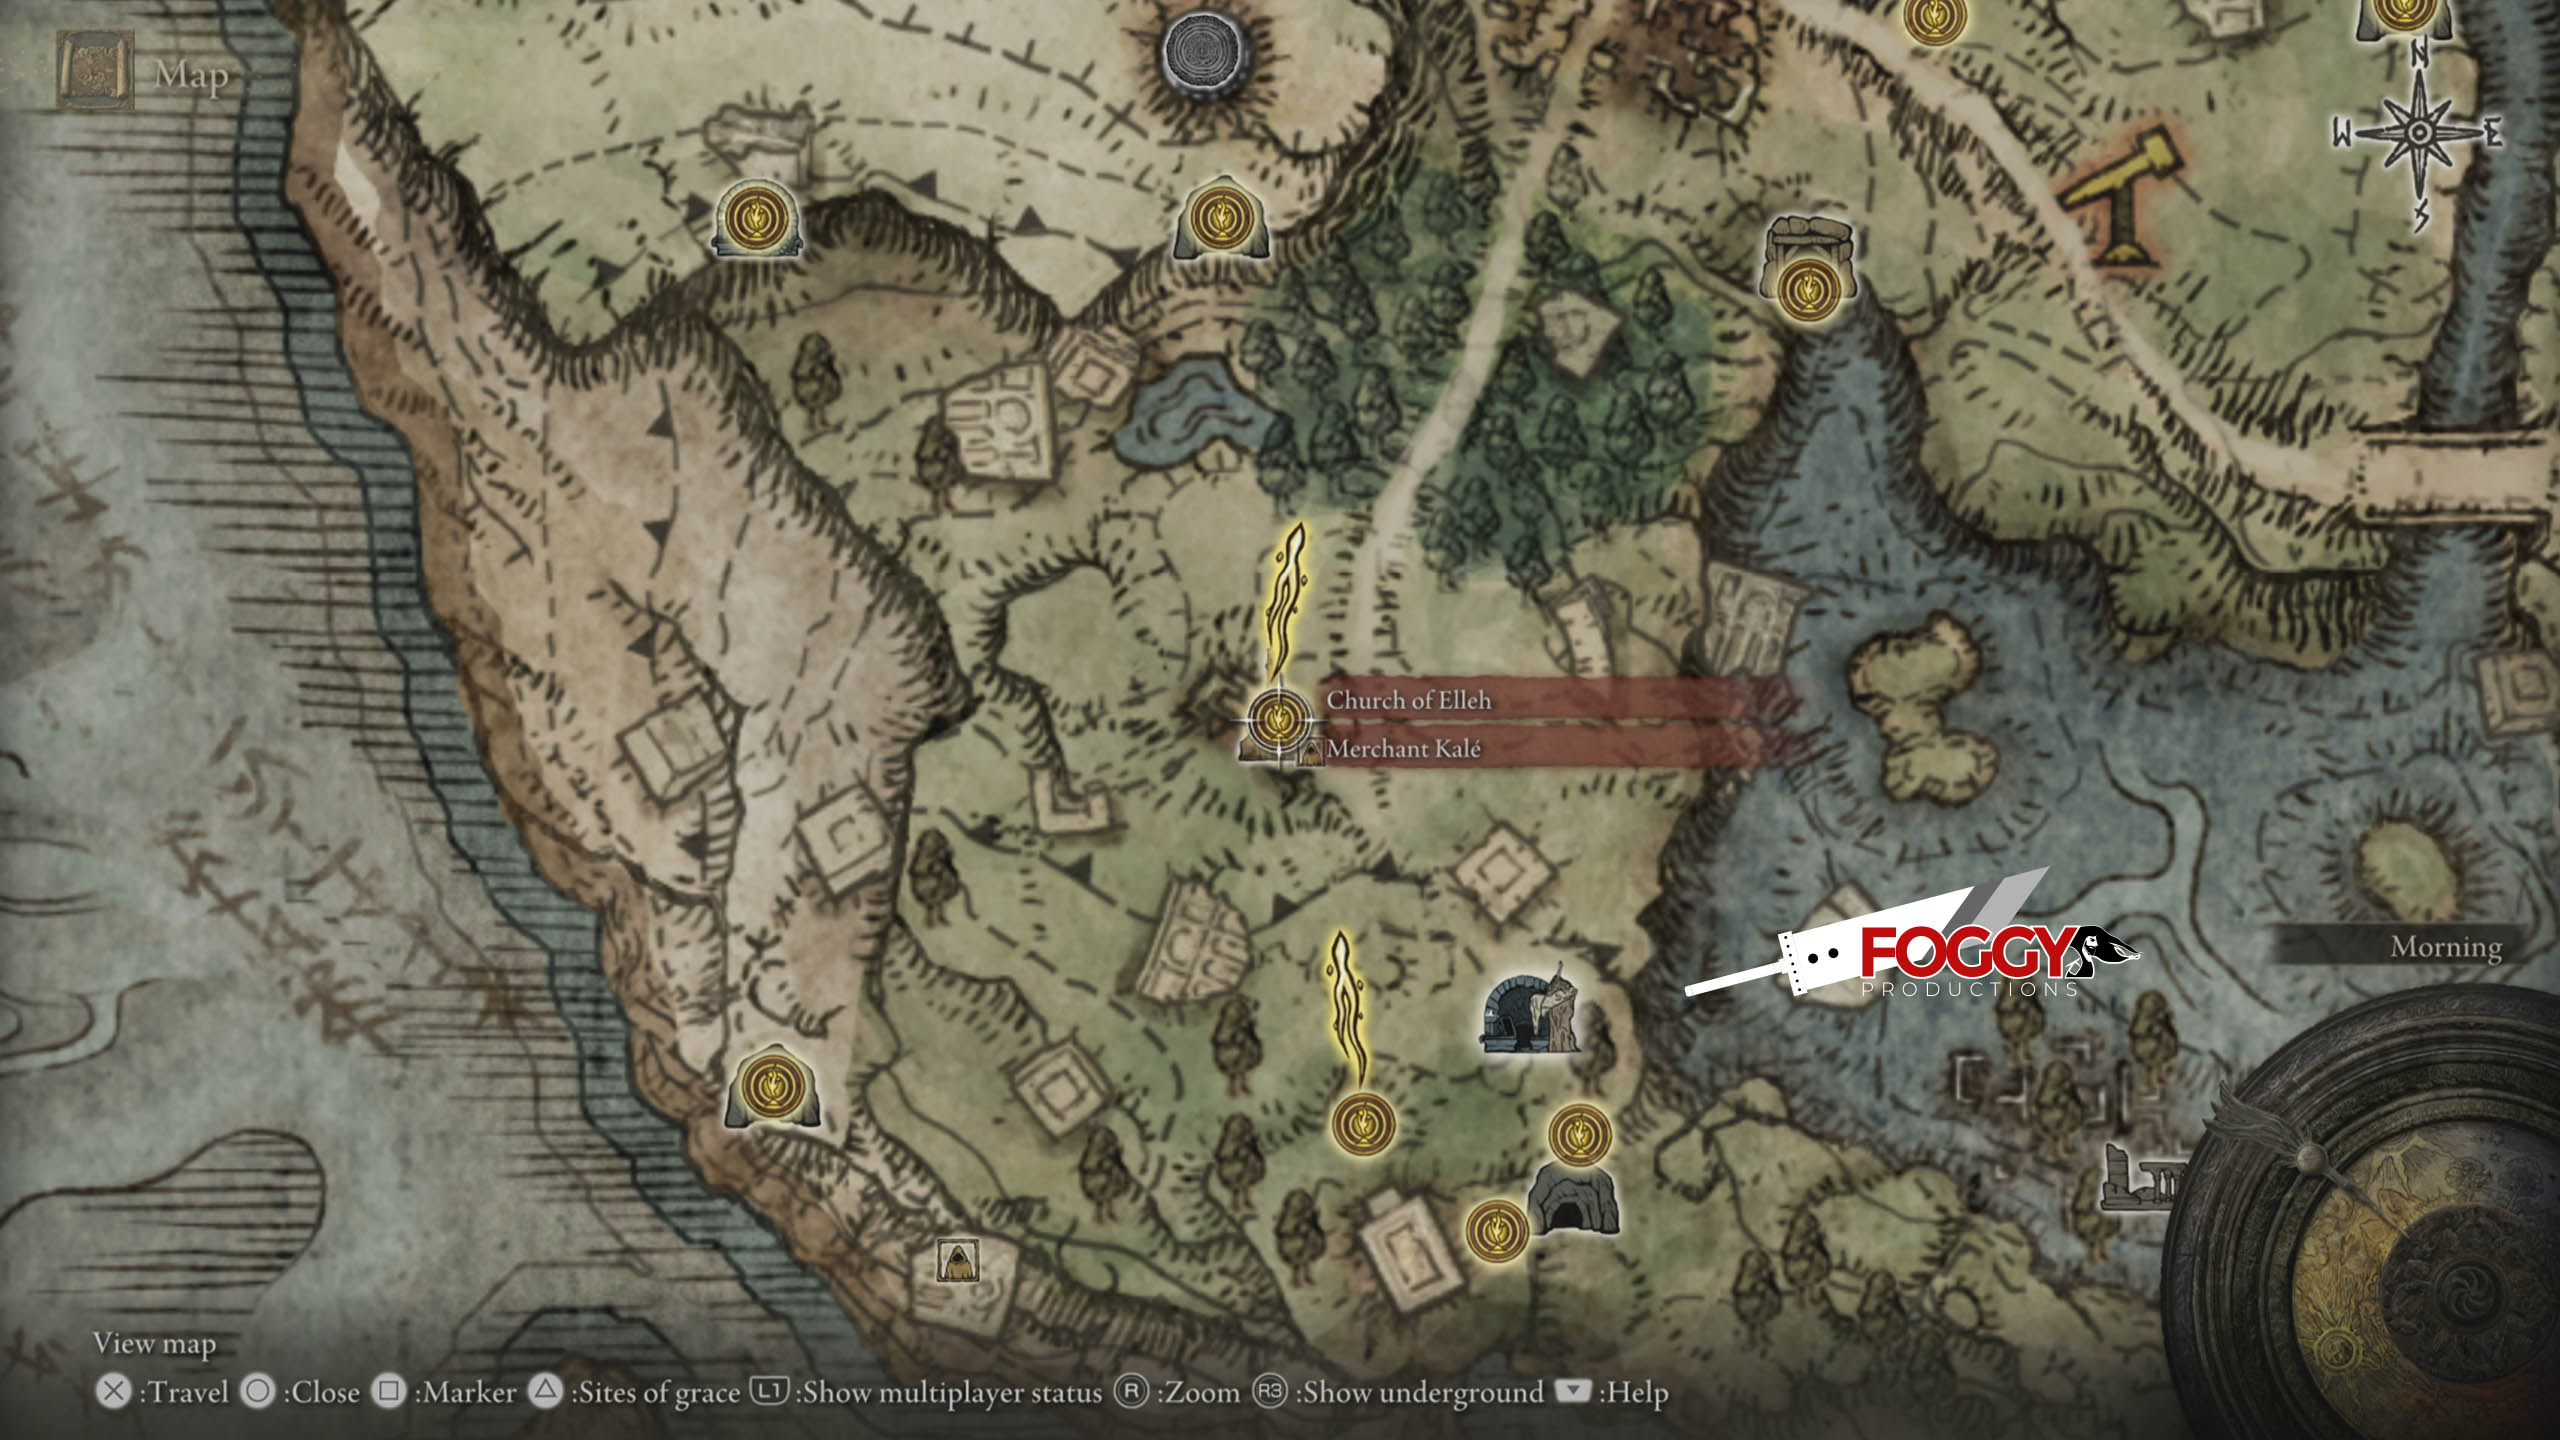
You can find a merchant there - buy Crafting Kit, Telescope, Cracked Pot x3, Missionary's Cookbook (1), Nordic Warrior's Cookbook (1), Nordic Warrior's Cookbook (2) & Torch from him and make you way towards the Gatefront Ruins. Note: you can return here during night time and meet Renna - she will give you Spirit Calling Bell which you need to call Ash Spirits. If you miss her here, no worries, you will not get blocked for her questline (she is part of missable questline, but this step is optional). To get the bell if you missed her - you can buy one in Roundhouse Table a bit later on (from the merchant there).
As for the crafting - when you buy Crafting Kit you can craft from your game menu by choosing "Item Crafting". It's quite simple. Pick up everything you can in this game, maybe you will need those items for crafting. Personally, I didn't craft much.
In Gatefront Ruins, loot the settlement to find weapons (Lordsword's Greatsword is an awesome starting weapon for melee, Flail is also here), map for Limgrave West & check the basement to find Whetstone Knife to unlock skills on weapons which you can channel on Sites of Grace. Not all weapons can have Ash of War weapon skill - some come with pre-defined weapon skill and such cannot channel skills you find. The others maybe can - if they can, set something so you can use it. One hint: If your shield has a skill, when you one-hand wield your weapon, you will neeed to press triangle + R1 (if you hold weapon in the right hand) to hold weapon with 2 hands. Then you can use L2 to activate weapon's skill. If your shield doesn't have a skill, then you can just press L2 while one-hand wielding.
Just south from the Gatefront Ruins is another Site of Grace which will trigger a cutscene and you will get your horse mount. Meet Torrent! Equip the Spectral Steed Whistle key item on your item slot and use it by switching with down D-pad button, and then pressing the action button (square on PS, X on Xbox).
I will give you some pointers what is a "must" during this region, you can choose whatever you want from the optional dungeons:
- Dragon Communion Seal from Fringefol Hero's Grave
- Ashes from different warriors found in different caves
- Margit's Shackle (if you want help with Margit boss) from Murkwater Cave
- Uchigatana (katana) if you like katananas - from Deathouched Catacombs
- Assasin's Crimson Dagger Talisman from Deathouched Catacombs (heals HP on crit blows)
- Twinblade from Dragon Burnt Ruins if you like twinblade weapons
- Dragon Hearts from certain dragon spots if you want dragon magic in Church of Dragon Communion
- Memory Stones from Oridys's Rise (they expand your spell slots)
- Ashes of War: Lhutel the Headless from Tombsward Catacombs (strong spirit summon)
Stormveil Castle
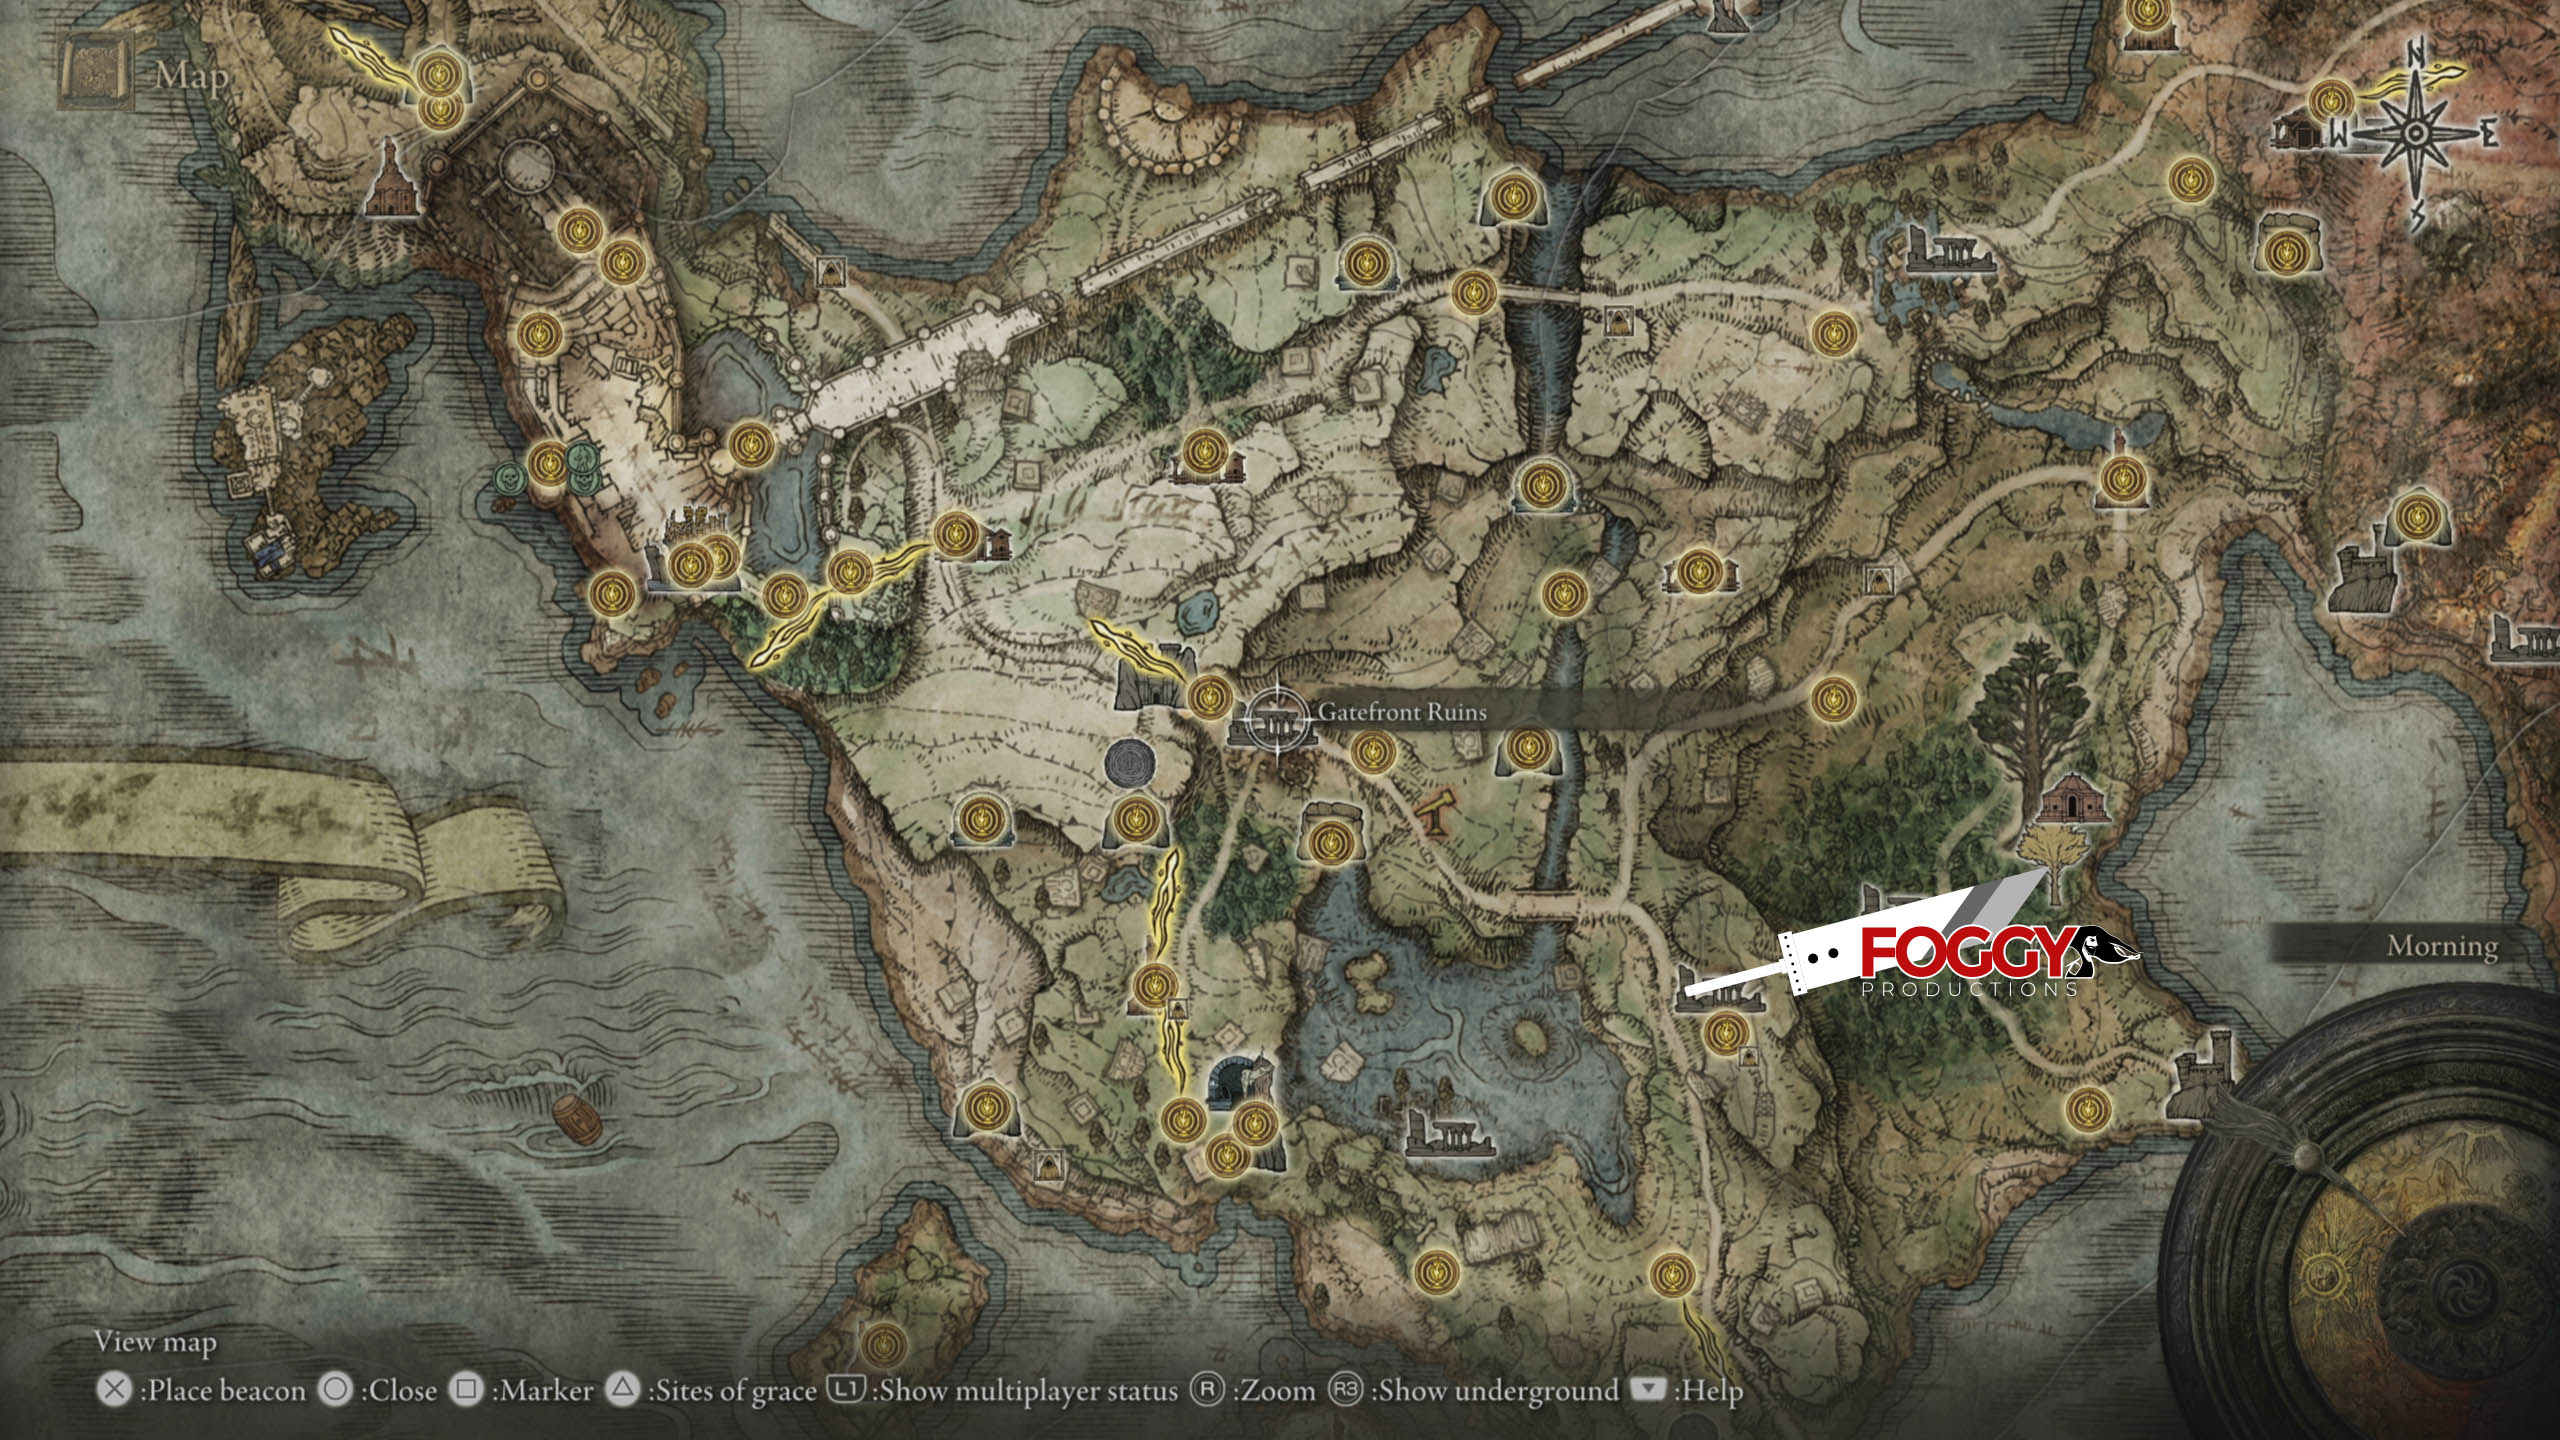
North from the Gatefront Ruins is a path going upwards - it leads to Stormveil Castle, and this is where you need to go. Just west from the "Gatefront" site of grace on the top of the hill is your first Golden Seed - just look next to the golden tree on the ground. Usually you can find the seeds when you see the golden tree on the ground, but they are also drops from some mini-boss fights.
Close to the seed you should encounter Roderika at Stormhill Shack (find it up the hill just northwest from the Gatefront site of grace). There is a Stonesword Key here.
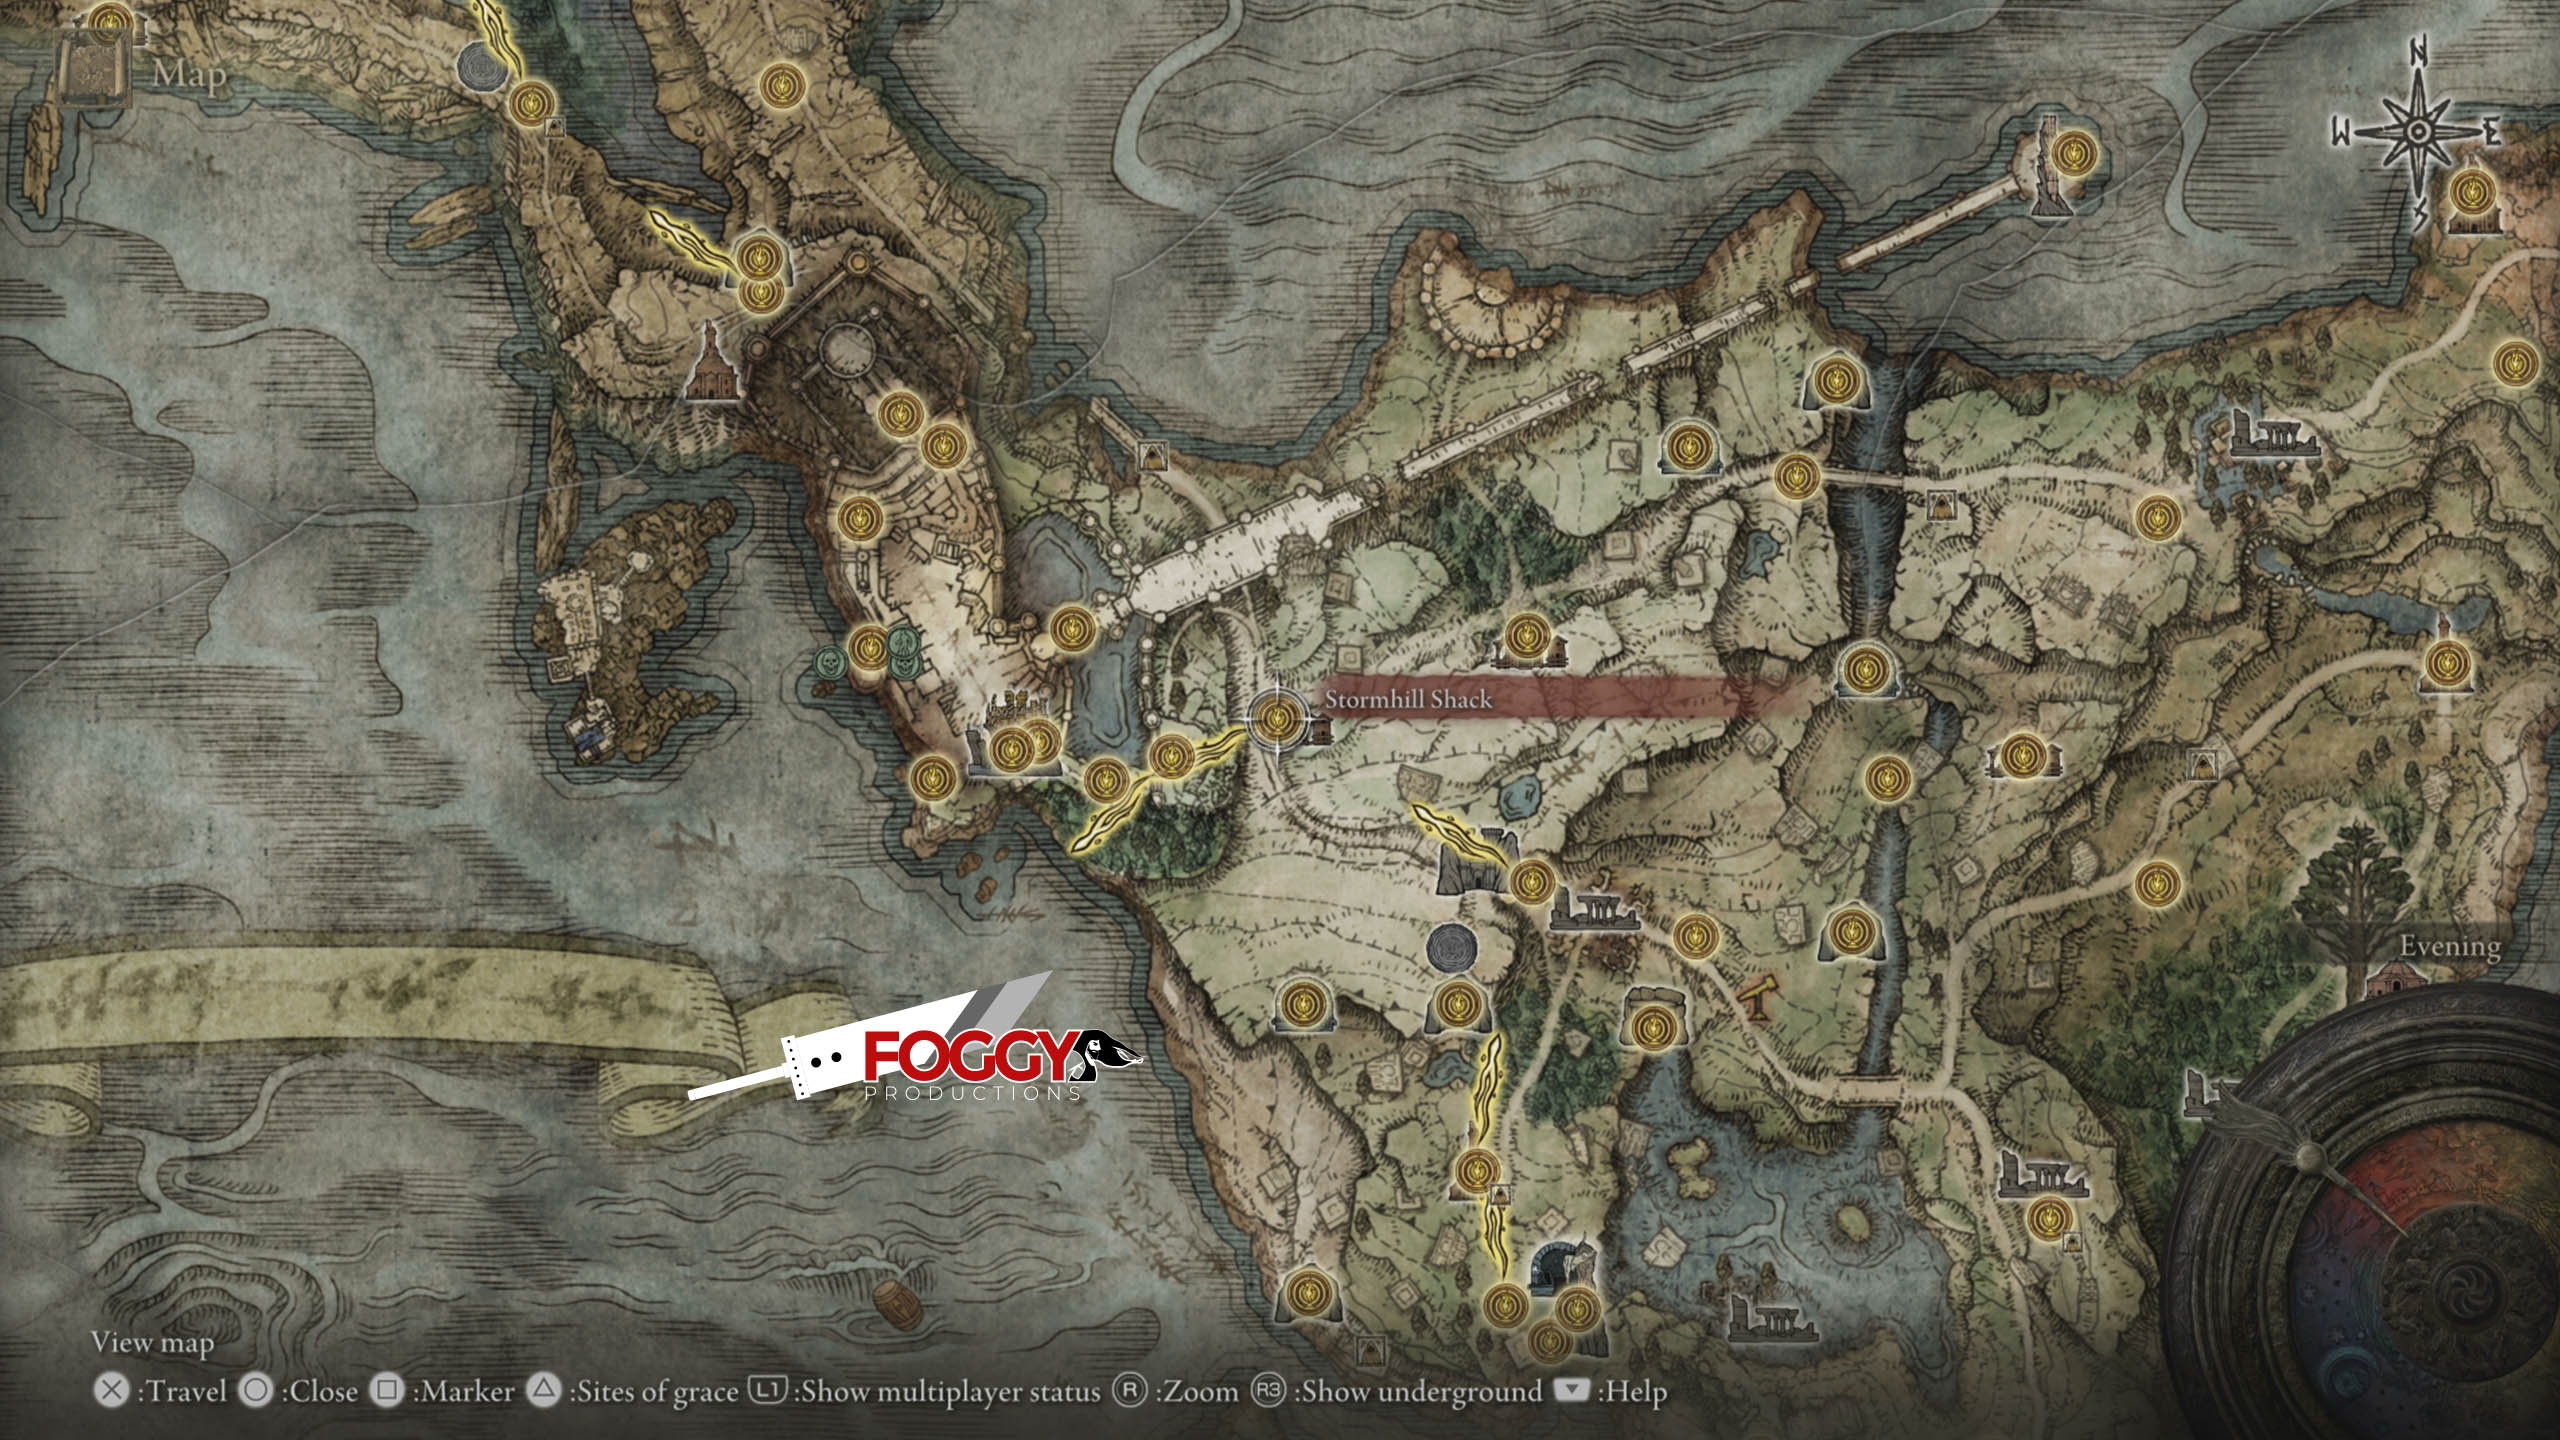
Roderika is a spirit-tuner. She will move to the Roundtable Hold if you progress her quest. Make sure to talk to her at Stormhill Shack until you exhaust her dialogue options. By talking to her several times, you'll obtain the Sitting Sideways gesture and Spirit Jellyfish Ashes - which you can use as your spirit summon.
So, you need to reach Stormveil Castle and defeat Margit - your first story boss. The next video prepares you for the journey and shows you where you need to go. One note: when you die during the fight, resting at the Site of Grace before Margit will take you to Roundtable Hold - this is main game hub where a lot of NPC show up. There are 4 missable trophies, and I will point you with who to talk and when. Buy Spirit Calling Bell from Twin Maiden Hushs if you've missed Renna in the Church of Elleh.
Let's defeat Margit.
0:01 - Collect Whetstone Knife so you can use Ash of War skills
0:36 - Lordsworn's Greatsword
1:12 - Godrick Soldier Ashes
1:38 - Beast Crest Heater Shield
1:56 - Equip Ash of War skills on Weapon and Shield
2:08 - Margit, The Fell Omen Boss Location
2:24 - Margit, The Fell Omen Phase 1
4:41 - Margit, The Fell Omen Phase 2 (Margit, The Fell Omen trophy)
Congrats! You can now progress the Castle Stormveil and see if you can make it alive! You might want to return to Roundtable Hold and progress Roderika's questline so she starts selling spells and so that you can upgrade your Ashes using the Grave Glovewort items (they are found in catacomb optional dungeons usually). To do so - talk to her, she will mention her purpose. Talk to Blacksmith and ask about her. Teleport to update the progress and keep doing this until she sits next to the blacksmith where you can then use her shop. She may reward you with Golden Seed in the process, but I chose Golden Seed as a perk during my character creation, so I didn't get one.
While you are here, also try to talk to Fia in the room beyond Blacksmith and let her hug you - do this every now and then, she is a part of a missable trophy questline. Eventually, much later, she will give you a knife and you will have to give it to D character (yes, his name is "D"), but for now, have this in mind to talk to her and let her hug you as you progress main dungeons.
The Stormveil Castle is really big, but fortunatelly I have just the thing for you:
0:15 - Marred Leather Shield
1:20 - Hookclaws weapon
4:00 - Rusty Key & Curved Sword Talisman
5:55 - Brick Hammer weapon
8:45 - Arteria Leaf x3
9:17 - ***Rampart Tower teleport point***
11:40 - Stonesword Key
12:46 - Dozing Cross-Legged Gesture
14:14 - Claw Talisman
16:32 - Unlocking shortcut #1
17:54 - Nomadic Warrior's Cookbook (10)
19:53 - Arbalest weapon
20:57 - Festering Bloody Finger x3
22:10 - Wooden Greatshield
22:40 - Fog Doors #1: Godslayer's Seal weapon & Godskin Prayerbooks)
24:10 - Crimson Hood Armor (No more Chrysalids' Memento in this version of the game)
24:55 - Highland Axe weapon
25:28 - "Prophechy" Painting
27:25 - Marred Wooden Shield
28:31 - Ashes of War: Storm Assault
29:28 - Shortcut #2
31:11 - Crucible Knight: Aspects of the Crucible: Horns
33:26 - Rogier NPC (Sells 3 Ash of War Skills: Glintstone Pebble, Carian Greatsword and Spinning Weapon)
39:00 - Stonesword Key & Pickled Turtle Neck x3
41:14 - Mimic's Veil
42:05 - Fog Doors #2: Iron Whetblade, Misericorde weapon & Hawk Crest Wooden Shield
43:50 - Pike weapon
45:54 - ***Gateside Chamber teleport point***
47:10 - ***Limgrave Tower Bridge teleport point***
49:55 - Golden Seed
50:37 - Talk to Nepheli, you can summon her for the boss fight
51:07 - ***Secluded Cell teleport point***
51:58 - Ash of War: Stormcaller
52:26 - Cracked Pot x2
52:38 - Manor Towershield weapon path
55:20 - Shortcut #3
56:46 - Arteria Leaf x1
57:32 - Rancorcall spell
58:58 - Hidden Worm boss: Golden Seed as reward, Stonesword Key, Prince of Death's Pustule
1:03:06 - After defeating Boss, you can kill this NPC and take the bell to Twin merchant at Roundtable, she will sell his items there
1:03:32 - Shabriri Grape
1:04:59 - You can continue Rogier's questline after defeating Godrick (Roger's Rapier +8 weapon)
1:08:57 - Path to Rune Restoration Tower & Boltdrake Talisman
1:10:38 - Ash-of-War Scarab
1:16:15 - Great Rune Trophy (Restoring Godrick Rune)
1:16:57 - Nepheli: Talk to her after Godrick to get increase equip load talisman
And the separate, full guide how to beat your first Rune bearer boss, Godrick:
0:01 - Collect Golden Seed and talk to Nepheli: She can help you during the boss fight
1:34 - Boss Loadout
3:31 - Godrick the Grafted - Phase 1
5:35 - Godrick the Grafted - Phase 2
7:20 - Godrick's Great Rune & Remembrance of the Grafted (Shardbearer Godrick Trophy)
Roundtable Hold - Open world madness starts here
After beating Godrick, you need to return to Roundhouse Table and new doors (behind you when you teleport there) will be opened. Enia NPC is there, and she can exchange boss Remembrance souls for whatever they rewards you with. You can duplicate the Remembrance souls at altars on top of the big beast with bell which roams around maps. There are only few, so be careful which one you want to duplicate (if you want).
Talk to Gideon in his room (he is the one wearing the mask, he is in the left room on the side where the merchant is). Exhaust all options. You can now go whenever you want on your way to become another Elden Ring God.
Restoring Great Runes
Since you have your first Great Rune from Godrick, you can follow the above Stormveil video and reach top of the first tower to unlock Great Rune trophy by restoring the rune (teleport to Limgrave Tower Bridge site of grace and follow the bridge to the east). To restore other Great Runes - you need to ascend the similiar towers in region where the rune is found and activate it on the top.
Equipping Great Runes is not enough for them to take effect on you. After restoring one and equipping it over site of grace - you need to use Rune Arc item to active its full potention. When you die, the rune is deactivated. Good luck maintaining this!
Morne Castle - Optional Dungeon and a trophy
Since you did the Stormveil Castle, you can finish up mopping up the Limgrave region if you want, especially you need to complete the Castle Morne at the southern peninsula of Limgrave South to get another trophy and get your first Legendary Arnament. I got here after Godrick boss and I was around level 40, and the fight at the end was very easy. Also, it rewards you with one of the best greatswords in the game - but good luck using it at this point!
0:01 - Castle Morne Lift teleport
0:50 - Smithing Stone (2)
1:23 - Fire Grease
2:05 - Smithing Stone (1)
2:30 - Claymore weapon
4:20 - Furlcarling Finger Remedy
4:40 - Steel-Wire Torch weapon
6:10 - Smithing Stone (2)
7:25 - Behind the Castle teleport
8:10 - Stonesword Key x1
8:45 - Pickled Turtle Neck x1
10:10 - Twinblade Talisman
11:30 - Tarnished Golden Sunflower
12:50 - Smithing Stone (2)
13:30 - Whip weapon
14:10 - Beside the Rampart Gaol teleport
15:10 - Throwing Dagger x8
15:25 - Somber Smithing Stone (1)
16:00 - Fire Arrow
17:20 - Leonine Missbeggoten boss: Grafted Blade Greatsword weapon (Leonine Misbegotten trophy)
After you clean Castle Morne you can finish up cleaning Limgrave West and South regions, and move to East Limgrave. There is another optional dungeon there, which you need to beat to get another optional trophy. It's a big one, and it's not the easiest one for sure.
Siofra River Well - Optional dungeon and a trophy
Siofra River Well is also one of the optional dungeons, in this case even whole map of underground part where you can find mutliple weapons, spells and items. There is also a trophy at the end for beating the boss. There is also one mini-boss. I was level 49 here, and it wasn't easy. Don't worry about distant parts of this Well - we will get there much, much later.
0:01 - Siofra River Well Entrance
1:45 - ***Siofra River Well Depths teleport***
2:10 - Golden Rune (3)
2:25 - Furlcarling Finger Remedy & Grave Glovewort (1)
2:50 - Silver Firefly x5
3:40 - Golden Rune (2)
5:40 - Budding Horn
5:56 - Throwing Dagger, Silver-Picklet Fowl Feet x3 & Oracle Bubbles spell
6:54 - Rainbow Stone x5 & Immunizing Cursed Meat & Golde Rune (2) & Smithing Stone (2) & Golde Rune
7:50 - Smithing Stone (4)
9:05 - Smithing Stone (4) & Golden Rune (4)
9:30 - Golden Rune (4)
10:20 - Preselving Boluses x1
11:00 - Best Liver x3
11:30 - Crab Eggs x3
12:30 - Grave Glovewort (1)
12:50 - ***Siofra River Bank teleport***
13:10 - Golden Rune (3)
13:30 - Flame Statue #1/8
14:05 - Armorer's Cookbook 6 crafting recipe
14:20 - Flame Statue #2/8
15:10 - Lump of Flesh
16:10 - Somber Smithing Stone (2)
16:40 - Ghost Glovewort (3)
17:20 - Stonesword Key
18:15 - Dwelling Arrow x10
18:55 - Golden Rune (4)
19:00 - Horn Bow weapon & Golden Rune (6)
20:00 - Ghost Glovewort (2) & Map: Siofra River
20:25 - Inverted Hawk Header Shield
20:50 - Old Fang x2
21:15 - Golden Rune (4)
21:55 - Furlcarling Finger Remedy
22:10 - Smithing Stone (4)
22:48 - Golden Rune (4)
23:06 - Ghost Glovewort (2)
23:15 - Gold-Pickled Fowl Foot x2
24:10 - Smithing Stone (3)
24:40 - Smithing Stone (2) & Dwellling Arrow x10 & Drappled Cured Meat x1
25:05 - Somber Smithing Stone (2)
25:10 - Teleport Point #2
26:20 - Slumbering Egg
26:55 - Somber Smithing Stone (5) & Great Oracular Bubble spell
27:28 - Golden Rune (7)
28:50 - Ghost Glovewort (5)
29:05 - Dragonkin Soldier boss: Dragon Halberd weapon
31:10 - Marika's Scarseal
31:41 - Golden Rune (7)
32:05 - Ghost Glovewort (4)
32:30 - Golden Seed
33:20 - Stonesword Key
34:14 - Teleport Point #2 (continue from this point) - Shield Griese
34:40 - Flame Statue #3/8
35:05 - Golden Rune (3)
35:20 - Golden Rune (2)
36:00 - Gold-Pickled Fowl Foot x1
36:15 - Flame Statue #4/8
36:50 - Silver of Meat & Golden Rune (3)
37:44 - Shop (Buy Larval Tear item, Nomadic Warrior's Cookbook 17, Nomadic Warrior's Cookbook 18)
39:00 - Hefty Beast Bone x1
39:15 - Smithing Stone (3)
39:40 - Flame Statue #5/8
40:20 - ***Worshipper's Woods teleport point***
40:43 - Flame Statue #6/8
41:19 - Smithing Stone (2)
42:46 - Ashes of War: Square Off
43:25 - Flame Statue #7/8
44:00 - Flame Statue #8/8
44:25 - Rune Arc
46:00 - Golden Rune (4) & Sliver of Meat x3
46:45 - ***Below the Well teleport point***
47:05 - Ghost Glovewort (3)
47:20 - Clarifying Horn Charm accessory
47:40 - Stonesword Key doors - shortcut to outside
48:31 - Ancestor Spirit: reward is Ashes of War: Follower Ashes and Ancestor Spirit trophy
If you haven't already - progress any NPC questline you can in the Roundtable Hold if possible (Fia, let her hug you). Just talk with everyone and exhaust their options.
Liurnia Region
With this out of your way, you conquered Limgrave. You can now go beyond the Stormveil Castle (north exit after defeating Godrick) and make you way towards the Raya Academy in the middle of the swamp. There are some areas left and right of the swamp in this region, which you can of course tackle.
Elden Ring - Liurnia Optional Dungeons
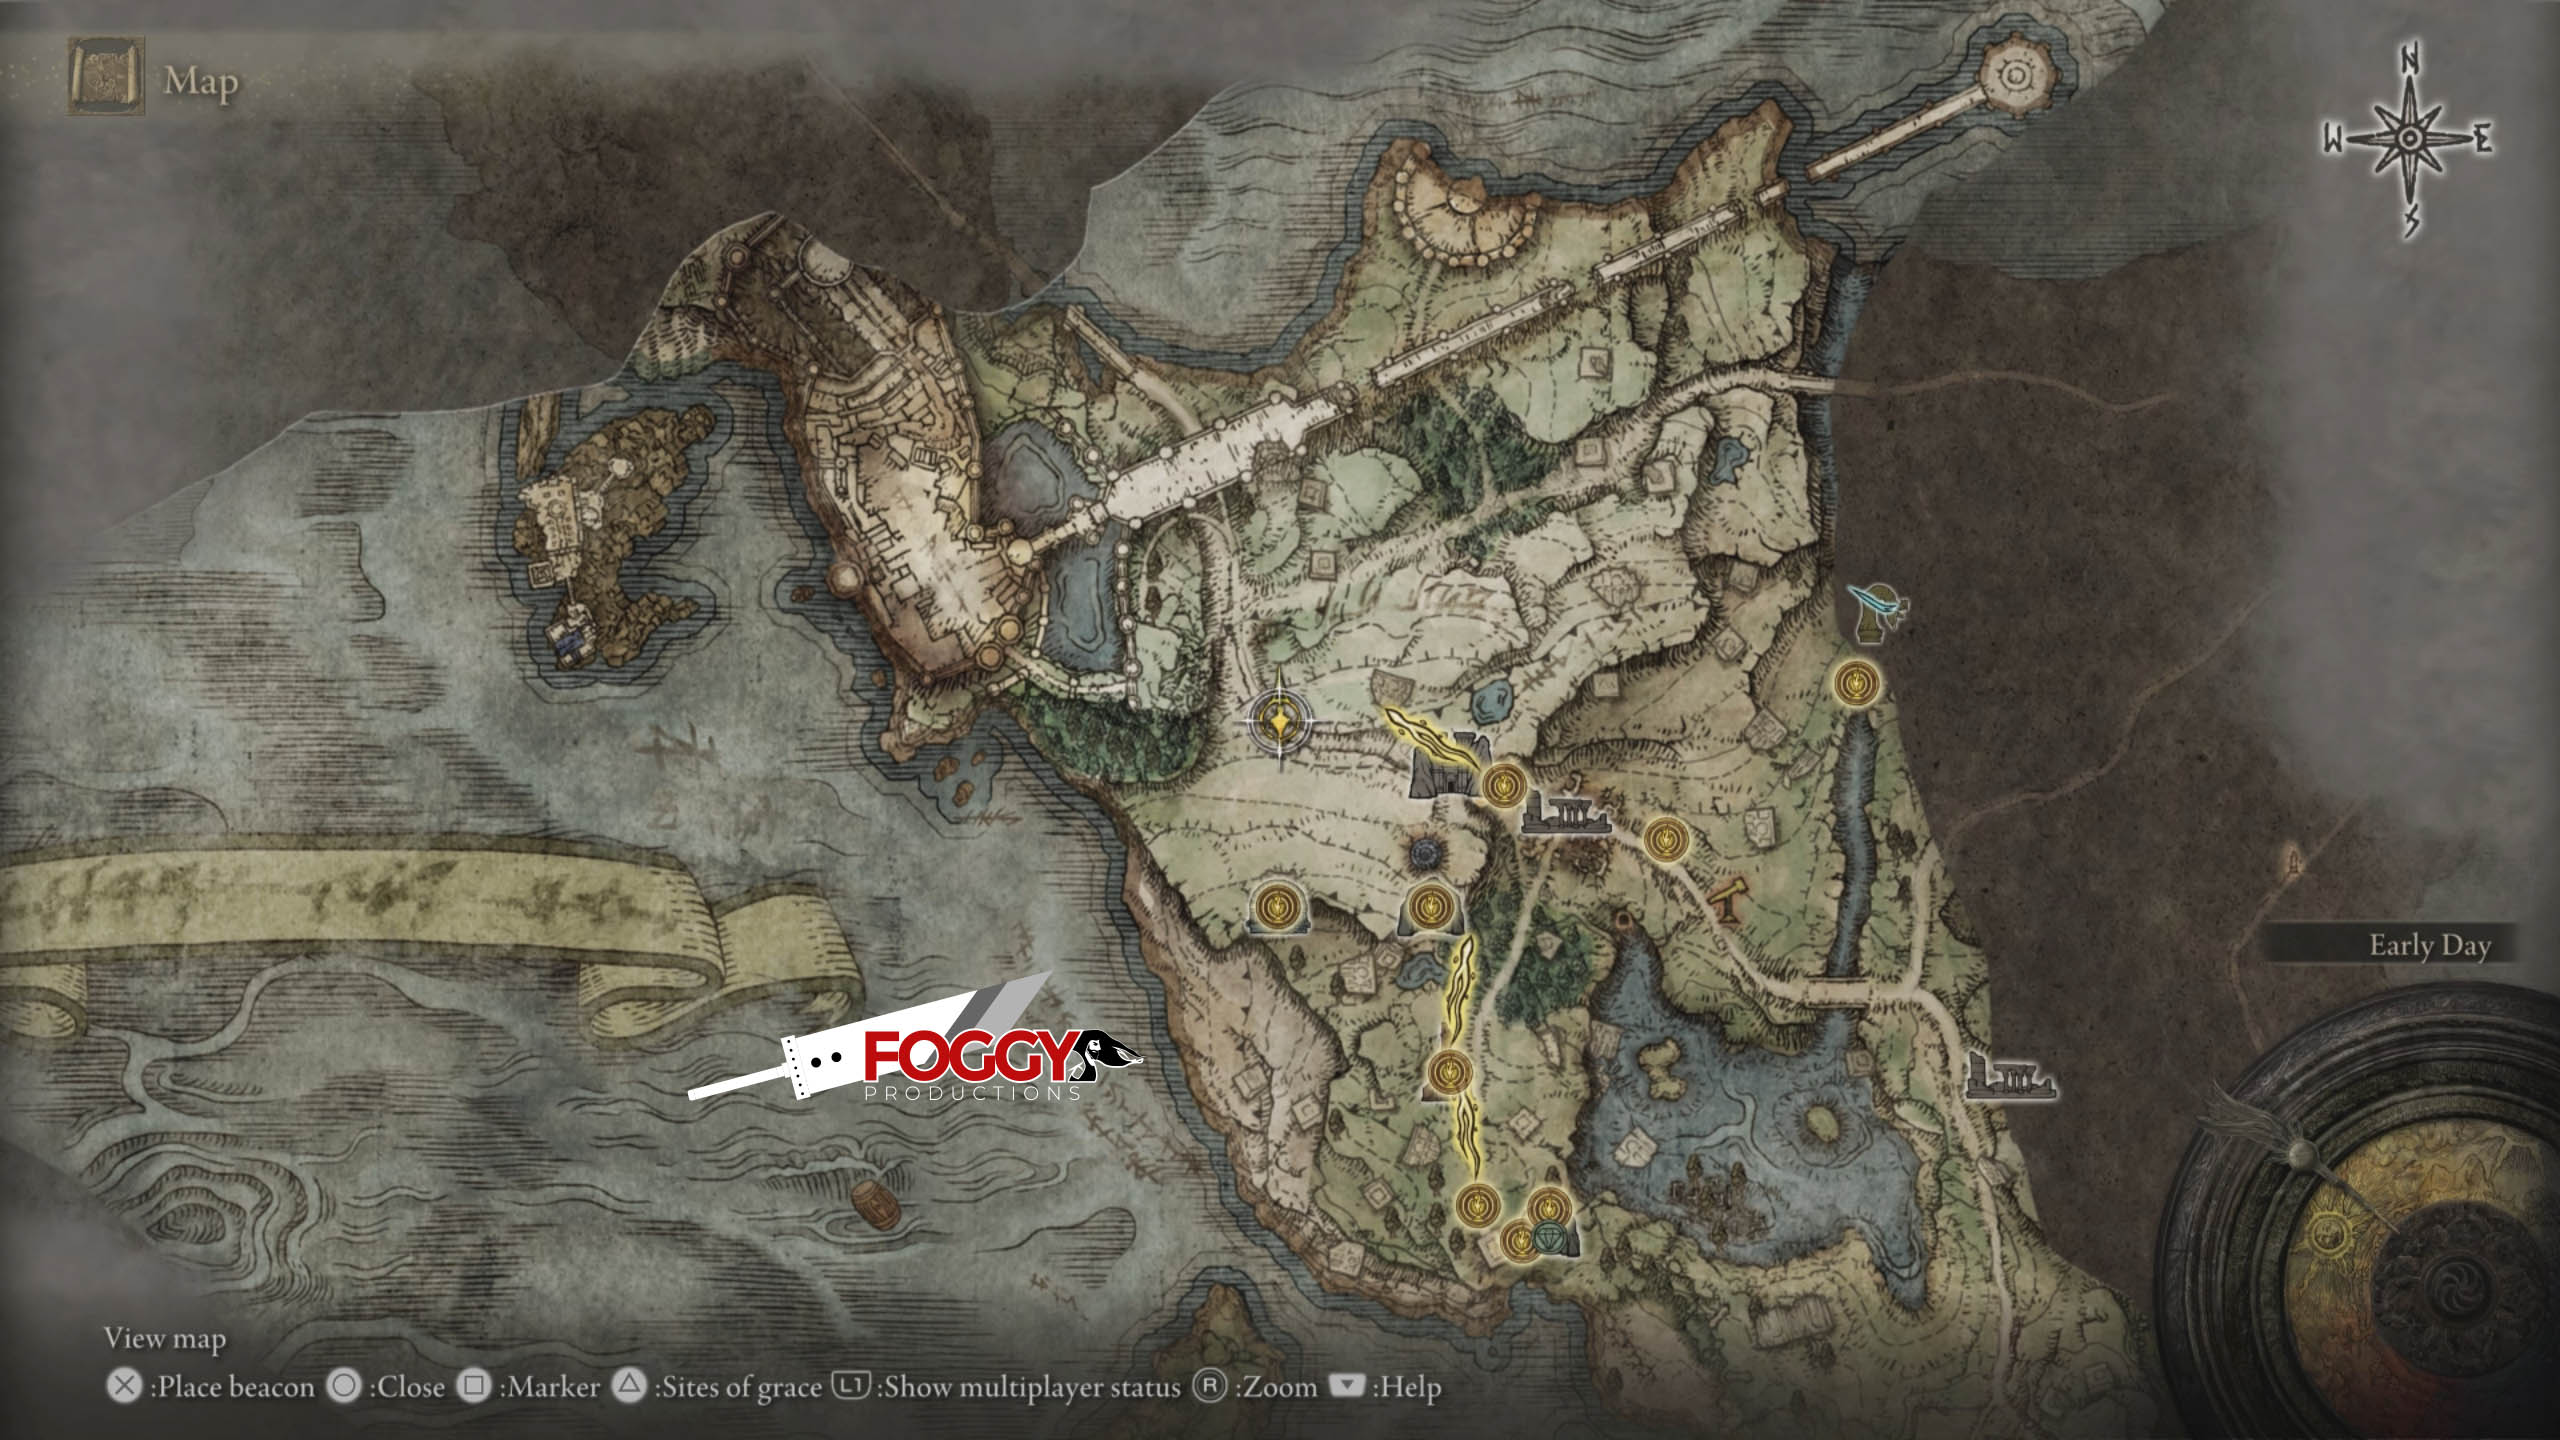
Raya Lucaria Academy
You want to visit Royal Academy, but you need a key to enter. Next video will guide you towards all of that, and cover the whole Academy with collectibles.
0:01 - Thops Questline start
1:38 - NPC location, Reaching Raya Lucaria Academy main gate entrance & Blue-white Wooden Shield
3:20 - ***South Raya Lucaria Gate teleport***
3:41 - Meeting Place Map (inspect to check location of Academy Glintstone Key)
4:18 - Academy Glintstone Key location
5:30 - Entering the Academy - ***Main Academy Gate teleport***
7:20 - ***Church of the Cuckoo teleport***
9:30 - Spellproof Dried Liver
10:20 - Grace Mimic x3
11:04 - Ash of War: Marionette Soldier Ashes
12:45 - Carian Knight Set (Helm, Armor, Gaunglets,Greaves)
14:51 - Ash of War: Spectral Lance
15:17 - Gravity Well spell
17:05 - Path to ***Schoolhouse Classroom teleport***
18:28 - Avionette Soldier Ashes
20:30 - Longtail Cat Talisman
21:50 - Teleport Monster
22:45 - Invisible Wall #1: Conspectus Scroll & Glintstone Craftstman's Cookbook (5)
23:49 - Olivinus Glintstone Crown
24:36 - Ritual Pot
26:00 - Invisible Wall #2: Comet spell and Stonesword Key
26:36 - (still inside invisible room): Unlocking saealed doors & Graven-School Talisman
28:10 - Red Wolf of Radagon (Red Wolf of Radagon troph): Memory Stone
29:30 - ***Debate Parlor teleport***
31:25 - Radagon Icon
32:40 - Cracked Pot
33:13 - Crystal Crab: Karolos Glintstone Crown helmet
34:06 - Golden Seed
35:45 - Roof Route start: Stonesword Key
36:20 - Glintstone Whetblade
37:20 - Opening Shortcut doors
40:05 - Full Moon Crossbow weapon
42:15 - Lazuli Glintstone Crown helmet
44:07 - Different roof path. Imbuded Sword Key
47:50 - Academy Glintstone Key & Important Shortcut Lader
49:33 - Shattering Crystal Spell
49:55 - Red Branch Shortbow weapon & Azure Glintstone Staff weapon
51:02 - Twinsage Glintstone Crown helmet
51:55 - Moongrum Carian Knight: Carian Knight's Shield
54:30 - Shortcut path
55:40 - Another shortcut path & Glintstone Scarab helm
57:45 - Path to boss
58:30 - Rennala Phase 1
1:00:58 - Rennala Phase 2 (Rennala Queen of the Full Moon Trophy, Remembrance of the Full Moon Queen, Great Rune of the Unborn)
1:03:50 - Locked Chest
1:04:35 - Thops Questline end: Thops's Bell Bearing, Academy Glintstone Staff, Thops's Barrier spell
Caria Manor
If you haven't already - progress any NPC questline you can in the Roundtable Hold if possible (Fia, let her hug you). Just talk with everyone and exhaust their options. Our next destination is, well, doing optional stuff in Luirnia, or Caria Manor in the northwest.
0:01 - ***Main Caria Manor Gate teleport***
2:30 - Glintstone Craftstman's Cookbook (6)
4:30 - Ice Crest Shield
4:45 - Carian Piercer spell
5:06 - ***Manor Lower Level teleport***
9:25 - Rune Arc
9:50 - Sword of Night and Flame weapon & Shortcut #1
1:55 - Urumi weapon
13:30 - Smithing Stone (3)
13:51 - Path to ***Manor Upper Level shortcut***
15:00 - Smithing Stone (4)
15:33 - Golden Seed
17:23 - Troll Knight's sword weapon (kill the beast)
20:00 - Crystal Dart x8
20:25 - Cracked Pot
23:35 - Ash of War: Carin Grandeur
23:52 - Royal Knight Loretta: Ash of War: Lorreta's Slash & Lorreta's Gretbow spell
26:20 - ***Royal Moongazing Grounds teleport***
26:41 - Shortcut #2 & Pidia Shop (Glintstone Craftstman's Cookbook (6) & Ash of War: Carian Retaliation)
30:05 - Stonesword Key
31:34 - Ranni Questline Start (Age of the Stars ending/trophy start)
38:25 - Memory Stone & Seluvis Questline start
The video above shows you the start of Renni's questline, which is really important - it's one that you need to do to get Age of Stars missable trophy. I will also paste steps that you can do in written form, maybe you can follow them more easily:
Age of Stars Questline start and progress
- (OPTIONAL) - Talk to Renna (Ranni) at Church of Elleh after unlocking Spectral Steed (you horse, rideable mount). This step is not mandatory for the questline (I completely missed her here and found her later on to start her questline). She will not be at this location anymore if you progressed the Stormveil Castle (defeated Godrick) and possibly initiated Rogier's questline.
- Defeat Rennala on top of Academy of Raya Lucaria dungeon. This will be one of your story missions, it's a huge library for which you need Academy Glintstone Key to enter (Elden Ring - Raya Lucaria Academy Walkthrough (Collectibles, Thops Questline, Boss Fights)
- Go through Caria Manor in the northwestern part of Liurnia region (directly north from the Academy of Raya Lucaria on a hill. You need to follow the road left of the swamp area on the middle). You will reach Three Sisters area behind that, and now you can enter Ranni's Rise tower, when you can find Ranni (she is not called Renna anymore, that liar!). Accept her request. Talk to her and minions around her, and her again until you exhaust all options. She will mention hidden treasure of Nokron and asks that you speak with War Counselor Iji, Blaidd and Seluvis.
- In Limgrave, visit Mistwood Forest where you need to enter the tower next to the tree icon on the map. That area is called Siofra River Well. Clear the area (Elden Ring - Limgrave Siofra River Well Full Walkthrough & Bosses (Collectibles, Ancestor Spirit) and talk to Blaidd who is located after the second Site of Grace, near the cliffside (follow the clifside on the side where the stairs with torches that you lit are).
- Speak with Seluvis in Seluvis’ Rise (second tower in Three Sisters mentioned above), and he will mention Sellen (if you triggered his Potion questline, don't worry - whatever you do and however you progress will not affect this questline).
- Speak with Sellen inside the Waypoint Ruins basement (Elden Ring - Waypoint Ruins (Unlocking Sellen, Sorcerry merchant) She mentiones that Starscourge Radahn stopped the stars, and that defeating him is the key to Nokron's secrets. Well, of course it is!
- Go back to Blaidd and talk to him again (same place in Siofra River Well). He mentiones he will meet you before Radahn boss.
- Talk to Blaidd in the Redmane Castle couryard before the Radahn fight. It's imposible to miss him there (you will see this step in the Redmane Castle video walkthrough below)
Lichdragon Fortissax trophy questline start and progress
This questline is from Fia, and many steps from Age of Stars are needed to progress this one as well. I will point what you can do at this point, so you don't miss anything.
- Talk to Deathbed Companion at Roundtable Hold and let he hold you (confirm when she asks; she does that every time you speak with her).
- Visit her after certain events (for example after defeating story bosses which rewards you with Great Rune) and talk to her. Exhaust all of her options every time.
- Defeat at least one of the Tibia Mariner sub-bosses (the guy in the boat floating around) to receive Deathroot. You can also get one from the treasure chest in Deathouched Catacombs (Elden Ring - Limgrave Optional Dungeons). Deliver at least one to Deathroot Beast Clergyman inside the Bestial Sanctum. You can easily reach that area if you intiate questline in Summonwater Village, which reveals map location of teleport which you can find even without the quest. Visit it northest from the Third Church of Marika (really closely by) inside the forrest and use it to reach the Bestial Sanctum. This is in Caelid region.
- Speak to "D" sitting at the Roundhold Table table (you don't even have to speak, just make sure he is there)
- Complete Academy of Raya Lucaria dungeon. Even with just entering it you will unlock the blue barrier doors at the entrance. After using the ones to enter the Academy courtyard, there is another at other end which teleports your northeast - Bellum Road. In short, this leads to Altus Plateau which you need to reach to progress this questline. For me, just teleporting from Academy to Bellum Road did the job. When you do all that, talk to Deathbed Companion and accept her request. You will get Weathered Dagger.
- Speak with "D" about the Weathered Dagger. Exhaust all dialogues.
- Teleport again to Roundtable Hold
- Find "D" dead in the room past the Blacksmith
- Speak with Deathbed Companion and exhaust all dialogues. She will disappear.
- You need to progress Age of the Stars ending until you get Carian Inverted Statue from Renni (this is where you can't go further, so let's stop at this point with this one)
Considering you did all that, you might've guessed - our next goal is Caelid region (east from Limgrave) and Redmane Castle. But first, we can finish Ainsel River.
Ainsel River Well South
You can only reach one part of this area from Liurnia, so let's do it.
0:01 - Ainsel River Well (Souht) Entrance
1:00 - ***Ainsel River Well Depths site of grace***
1:16 - Magic Grease x3
1:44 - Golden Rune (3)
2:32 - Grace Mimic x1
3:03 - Smithing Stone (3)
3:50 - Silver Firefly x2 & Golden Rune (1)
4:20 - Grave Glovewort (1) & Smithing Stone (3) & Shattered Arrow (Fletched) x10
5:25 - ***Ainsel River Sluice Gate site of grace***
6:51 - Smithing Stone (3)
7:10 - Golden Rune (10) & Rune Arc (defeat the big spider)
8:28 - Smithing Stone (4) & Celestial Dew
9:00 - Smithing Stone (1)
9:10 - Golden Rune (2)
9:15 - Golden Rune (3)
9:30 - Golden Rune (1)
10:40 - Golden Rune (3)
10:50 - Grave Glovewort (2)
11:20 - ***Ainsel River Downstream site of grace***
12:08 - Smithing Stone (1) & Grave Glovewort (1)
13:12 - Smithing Stone (3)
14:26 - Smithing Stone (3)
14:45 - Golden Rune (2)
15:00 - Golden Rune (3) & Magic Grease x2 & Throwing Dagger x6 & Furlcalling Finger Remedy
15:25 - Shield Grease
15:40 - Golden Rune (3)
16:10 - Map: Ainsel River & Shop (Nomadic Warrior's Cookbook 16, Perfumer's Cookbook 4)
17:30 - Crystal Dart x5 &
18:00 - Somber Smithing Stone (3)
19:05 - Soap x4
19:23 - Immunizing Horn Charm Talisman & Smithing Stone (2) & Grave Glovewort (1) and (2)
20:25 - Melted Mushroom x3 & Grave Glovewort (2)
21:05 - Dragonkin Soldier of Nokstella: Frozen Lightning spell (Dragonkin Soldier of Nokstella trophy)
23:05 - ***Dragonkin Soldier of Nokstella site of grace***
23:18 - Great Ghost Glovewort x1
Caelid Region
This region is hard! I was here around level 65 and I managed to complete Redmane Castle, but all dungeons and tower here gave me so much trouble. I suggest you start with Redmane Castle, or you can see what optional content holds here first:
Elden Ring - Caelid Optional Dungeons
Redmane Castle
Let's work our way to Redmane Castle. I would advise that you did Renni's questline up to this point (check above - it's all explained, plus you can watch the ending part of the Caria Manor video). By doing so, you will activate Redmane events with Radahn, and the next video follows that pattern (otherwise it will be a bit different with enemies and events - their order will be mixed).
0:01 - Arrow's Sting Talisman
3:40 - Smithing Stone (3)
8:40 - Smithing Stone (6)
12:45 - Ash of War: Flaming Strike
16:08 - Shortcut #1 & Smithing Stone (5) & Armorer's Cookbook (5) recipe
17:50 - Armorer's Cookbook (4) recipe
18:27 - Dog Fight x2 (Somber Smithing Stone (4), Beast Blood & Old Fang x2)
19:09 - Smithing Stone (4)
19:20 - Golden Rune (6)
20:40 - Path to ***Chamber Outside the Plaza teleport***
21:35 - Age of the Stars trophy progress (Blaidd)
22:16 - Talk to Alexander
23:06 - Polite Bow gesture
23:15 - Commence the Arena Lockdown (Boss fight stagging) & Heartening Cry gesture
25:10 - Smithing Stone (6)
25:32 - Somber Smithing Stone (5)
26:42 - Boss Preparation
27:09 - Starscourge Radahn: Radahn's Great Rune & Remembrance of the Starscourge (Starscourge Radahn trophy)
32:05 - Age of the Stars trophy progress (Blaidd) & Talk to Alexander
34:41 - Crucible Knight, Misbegotten Warrior Bosses: Ruins Greatsword LEGENDARY ARNAMENT weapon & ***Redmane Castle Plaza teleport***
39:08 - Smithing Stone (4)
39:30 - Courtyard Dog Showcase
41:35 - Flamebarge weapon
43:03 - Smithing Stone (5)
43:43 - Smithing Stone (3)
44:05 - Red-hot Whetblade key item
47:30 - Treasure Chest: Smithing Stone (6)
First of all, congrats for getting this far! This was not easy, at all. At this point you might be underleveled, and it's a smart idea to prepare for what comes next: that is either going towards the Altus Plateau, or Nekron, Eternal City. I will go to Nekron now, even though Altus is lower level area, but I want to follow the Age of Stars ending qustline and progress the other missable quest as well.
Let me give some middle-game tips and good points here in Caelid before goind any further. Before you start grinding tho, pick up Gold Scarab Talisman from Abandoned Cave to get more Runes after killing enemies.
This video will be a mash-up of a lot of things after Radahn boss in Caelid Region. it can also be used to prepare for that boss figth, but mostly it's what comes next and where to go next.
0:01 - Weapon preferance (Bloodhound's Fang): It has medium weight and you can upgrade it to +5 when you come to Caelid region. I will also show you few other melee weapons of this region, but this one I prefer.
0:14 - Bloodhound's Fang Quick Location: If you've missed this weapon, here is where to find it
0:39 - Radahn's Armor Set - After beating Radahn (check out my Redmane Castle video for walkthrough), you can buy his armor set in Roundtable Hold from Enia. It’s heavy, but we will grind a bit :)
1:14 - Meteoric Ore Blade: If you prefer even lighter build and a bit of magic - this Katana is your choice
2:00 - Greatsword: Great, but slow greatsword weapon, plus you can set some great Ash of War skill on it - but Bloodhound's Fang scales really good and has Bloodloss. See what fits you the best, I will stick to Bloodhound's Fang for a while
3:17 - Great Jar's Arsenal (One of best Eqiup load increase talismans) & Spiked Palisade Shield & Golem Greatbow: You can get towards it from Siofra River Well (check my videos for detailed guide). Use 2 Stonesword keys at the end to exit in Caelid region. Tough battle ahead - clean at least this golem archer so it doesn’t bother you in the next 3 fights
5:17- Great Jar's Arsenal 3 Invaders Fight Strategy: You need to defeat 3 invaders without dying. They are tough and RNG. If you get mages, you will probably die. Drag them off the cliff if you can
8:44 - Starscourge Heirloom: Great Talisman to raise STR if you go for some STR/DEX build. You can save up on some levels and invest in other attributes as this helps with STR
10:49 - Dectus Medallion (Left) - Atlus Plateau Route - If you want to reach mentione region, you will need both Dectus parts. You can use the other entrance, but this one is easier.
12:06 - Dectus Medallion (Right) - Atlus Plateau Route
12:45 - Atlus Plateau Route - After Radahn in Caelid you can either go here or in Nekron. I advise maybe Nekron, since it’s tied to missable Age of Stars trophy
13:16 - Nekron route - After Radahn in Caelid you can either go here or in Nekron. This is tied to Renni's questline and Age of Stars trophy, so you might want to follow this one. You can find full questline details on my web
14:44 - EXP grinding in Caleid #1: This is really close to Site of Grace, which means 8k EXP in 3 mins or so. Use the summon and keep on teleporting to respawn enemies.
16:55 - EXP grinding in Caleid #2: If you prefer this one, you can also get around 12k EXP here in 3 mins or so. I've abused both spots
With this done, we can go towards Nekron and finish that part now. Nekron is one of the optional underground city areas, but it's closed before you defeat Radahn in Redmane Castle. After you beat Nekron you will progress few things, so it's good that you do it. Also, Mimic Tear Ashes is inside - Maybe the best Legendary ash you can find in the game, so it's really worth your time (plus, some trophies will be unlocked here).
Nekron, Eternal City
0:01 - Reaching Nekron
1:40 - Ghostflame Torch weapon
2:50 - Rune Arc
3:30 - Golden Rune (6)
4:15 - Nascent Butterfly
4:40 - Smithing Stone (5) & Furlcalling Finger Remedy
5:25 - Golden Rune (6)
5:40 - Ghost Glovewort (3) & Claryfying White Cured Meat
5:50 - ***Nekron, Eternal City Site of Grace***
6:30 - Ghost Glovewort (3) and (4)
6:50 - Larval Tear
7:05 - Smithing Stone (5) & Greatshield Soldier Ashes
7:30 - Ghost Glovewort (3) x2
8:00 - Somber Smithing Stone (4)
8:30 - Ghost-Glovewort Picker's Bell Bearing (1) 9:05 - Golden Rune (7)
9:40 - Larval Tear
10:30 - Golden Rune (7) & Ghost Glovewort (3)
10:55 - Rune Arc
11:25 - Mimic Tear: Larval Tear x2 & Silver Tear Mask helmet (Mimic Tear trophy)
13:00 - ***Mimic Tear site of grace***
13:20 - Somber Smithing Stone (5)
15:40 - Flame #1/6
16:28 - Smithing Stone (5)
17:22 - Celestial Dew & Clarifying Horn Charm +1
18:30 - Smithing Stone (5)
18:59 - Smithing Stone (5) & Flame #2/6
20:00 - Ghost Glovewort (4)
20:20 - Ghost Glovewort (4) & Flame #3/6
21:47 - Somber Smithing Stone (5)
23:20 - Flame #4/6
23:20 - Ash of War: Enchanted Shot
24:48 - Flame #5/6
25:00 - Mottled Necklace +1 Talisman
26:30 - Stonesword Key
26:40 - ***Aqueduct-Facing Cliffs site of grace***
27:19 - Ghost Glovewort (5) & Golden Rune (12) & Ancestral Infant's Head
29:16 - Shinning Horned Headband & Flame #6/6
30:35 - Regal Ancestor Spirit: Remembrance of the Regan Ancestor (Regal Ancestor Spirit trophy)
35:02 - ***Ancestral Woods site of grace***
35:35 - Rune Arc
36:25 - Celestial Dew
38:00 - Golden Rune (7)
39:10 - Black Whetblade
40:00 - Stonesword Key Doors: Mimic Tear LEGENDARY Ashes
40:51 - Nox Flowing Hammer weapon
41:50 - Larval Tear from big metal ball enemy
43:30 - ***Night's Sacred Ground site of grace***
44:15 - Celestial Dew & Golde Rune (7)
44:56 - Fingerslayer Blade (Needed to progress Renni's Age of Stars ending questline) & Great Ghost Glovewort
45:12 - Nekron Alternative Route: Mottled Necklace
49:37 - Crucible Hornshield
50:58 - Missionary's Cookbook (5) recipe
51:58 - Order Healing spell
52:45 - Golden Rune (13) and (7) & Crucible Knight with Spear fight (Somber Smithing Stone 6) & Smithing Stone (5)
56:20 - Fia's Questline: Give D's armor set (progress Fia's quest until you have it) to this NPC to progress Fia's questline (Inner Order Gesture)
57:00 - Rune Arc
57:29 - Valiant Gargoyle (Valiant Gargoyle trophy) Boss Fight: Invest in Mimic Tear Ashes (mine was +5 here) and Grafted Blade Greasword (mine was +6)
1:00:50 - Great Waterfall Crest Coffin (this leads to Deeproot Depths - we will come here a bit later)
After Nekron, you should go and do Renni's questline as you now have Fingerslayer Blade. She will take it and give you Carian Inverted Statue, which goes on the pedastal inside Divine Tower in Liurnia region. When you put it there, the tower will invert and you need to reach the top (well, bottom) where you will find Cursemark of Death. Do this, and then we move to Nokstella. Note that Coffin at the waterfall area where you beat Gargoyle's leads to Deeproot Depths - you can go here now, but I will cover this a bit later, for now, let's do the Divine Tower of Liurnia.
Divine Tower of Liurnia
Note that you can't enter inverted part of the tower, nor reach the top - without following Renni's questline. You need Carian Inverted Statue which you need to put on the altar at entrance of the tower to invert it. Also, the mage here is one of the toughest opponest you will face - good luck!
0:01 - Carian Inverted Statue from Renni
1:14 - Path to ***Study Hall site of grace***
2:58 - Divine Tower regular path
3:30 - Golden Rune (3)
5:12 - Carian Glintstone Staff weapon
5:30 - Last Stage of fight with Miriam: Magic Downpour spell
8:02 - Cerulean Seed Talisman
11:10 - Miriam Inverted Phase 1
12:45 - Mask of Confidence helmet
13:40 - Miriam Inverted Phase 2: Lucidity spell
14:50 - Holyproof Dried Liver
14:25 - ***Liurnia Tower Bridge site of grace***
17:30 - Liurnia Tower Bridge fight: Godskin Armor Set (Hood, Robe, Bracelets, Trousers)
21:20 - ***Divine Tower of Liurnia site of grace***
22:00 - Cursemark of Death & Stargazer Heirloom
22:19 - Snow Witch Set (Hat, Robe, Skirt) & Teleport to River Well (towards Nokstella)
23:35 - Miniature Ranni doll
The video showed you how to reach yet another underground area. Basically, after the Divine Tower of Liurnia you will have the Cursemark of Death key item. You can now enter Ranni's Tower in Three Sister beyond Caria Manor location in Lurnia, where you will find a teleport. That will warp you towards Nokstella - and just few meters from where you start, you can find Miniature Ranni Doll in the opened coffin in front of you. Now you can talk to Ranni's Doll on the site of grace by resting there and chooing the talk option, and she will ask you to defeat Baleful Shadow invader. Well, we need to do that now, so let's go!
Nokstella, Eternal City
Fun area! You can use this area to level up a bit on the electricity blobs - when you kill one it explodes, and kills all other blobs that are close. Since it's really close to site of grace (Nokstella, Eternal City) - you can abuse this a bit if you feel under-leveled. I liked this area, it's mystical. After you defeat Baleful Shadow boss, move forward and you will reach Lake of Rot - really tough area becouse of the scarlet root lake that drains your HP like crazy. I will be coming here a bit later, let's do the Nokstella part first.
0:30 - Snow Witch Set (Hat, Robe, Skirt) & Teleport to River Well (towards Nokstella)
1:20 - Miniature Ranni doll
1:35 - ***Ainsel River Main site of grace***
3:19 - Somber Smithing Stone (7)
4:10 - Ghost Gloveworth (7)
4:30 - Ghost Gloveworth (6) and (7)
4:50 - Golden Rune (7)
5:05 - Smithing Stone (4)
5:10 - Golden Rune (7)
5:20 - Human Bone Shard x3
5:45 - Stonesword Key
6:00 - Clayman Ashes & Ghost Gloveworth (6)
7:05 - Stimulating Boluses
7:45 - Golden Rune (10)
8:20 - Shield Grease
8:26 - Somber Smithing Stone (6)
11:10 - Ghost Gloveworth (6)
11:18 - ***Nokstella, Eternal City site of grace***
11:58 - Ghost Gloveworth (7) & Smithing Stone (6)
13:05 - Drawstring Holy Grease
13:30 - Silver Tear Husk x3
14:05 - Celestial Dew
15:00 - Ghost Gloveworth (7)
15:20 - Ant's Skull Plate
17:00 - Fan Daggers weapon
17:28 - Great EXP grind place
17:50 - Ghost-Glovewort Picker's Bell Bearing 2
19:10 - Archer Ashes
19:50 - Golden Rune (10)
20:00 - Somber Smithing Stone (7)
20:35 - Golden Rune (10)
21:15 - Stonesword Key Doors: Nighmaiden & Swordstress Puppets Ash of War
22:30 - Golden Rune (10)
23:25 - Great Ghost Glovewort x1
25:15 - Golden Rune (10)
25:25 - Smithing Stone (6)
26:20 - Somber Smithing Stone (7)
28:00 - Somber Smithing Stone (6)
28:25 - Moon of Nokstella
31:35 - Golden Seed
33:20 - Stonesword Key
35:00 - Celestial Dew
35:37 - Path to ***Nokstella Waterfall Basin site of grace***
36:15 - Somber Smithing Stone (7)
37:50 - Ghost Gloveworth (8)
38:10 - Ghost Gloveworth (9) and (8) & Golden Rune (10) & Smithing Stone (6)
41:05 - Ghost Gloveworth (9)
41:45 - Baleful Shadow: Discarded Palace Key & Lake of Rot path
45:30 - Moon Ring from Raya Academy locked chest
With the Discarded Palace Key in your possesion, move to Raya Academy top and open the locked chest there to get Moon Ring. We will continue this questline a bit later. Now, we go to Altus Plateau region. You can reach it by using the workaround route instead of gathering 2 Dectus Medallion parts.
Altus Plateau
It's not a bad idea to open both paths. For sure, use the one where you climb as it unlocks the trophy at the end, and you will get cool weapon at the end. It's an easy dungeon if you've been following my progression guide, you should be much stronger at this point than this area requires from you.
0:01 - Golden Seed
1:15 - Smithing Stone (5)
1:25 - ***Ravine-Veiled Village***
1:43 - Ash of War: Barbaric Roar
2:02 - Smithing Stone (4)
3:35 - Smithing Stone (3) and (4)
4:30 - Smithing Stone (5)
5:35 - Golden Rune (5)
6:05 - Lightning Grease x2
6:35 - Rune Arc
7:30 - Somber Smithing Stone (4) and ***Ruin-Strewn Precipice site of grace***
12:20 - Golden Rune (5)
13:25 - Seprent-God's Curved Sword
16:25 - Rune Arc
16:35 - Lost Ashes of War
17:10 - ***Ruin-Strewn Precipice Overlook site of grace***
17:35 - Magma Wyrm Makar: Magma Wyrm's Scalesword weapon
20:10 - ***Magma Wyrm site of grace***
20:20 - Altus Plateau Exit
You can start doing the optional stuff in this region, or visit The Shaded Castle on far north, northwest of the region. I did couple of optional dungeons and just moved to Shaded Castle, and then we will do Leyndell, and Volcano Manor on Mt. Gelmir.
Elden Ring - Altus Plateau Optional Dungeons
The Shaded Castle
This is an optional area, but it grants you one trophy at the end. It's very poisonous, so prepare for that. Not so tough, you should be strong at this point. Also, it's relatively short in comparison to other castles we did so far.
0:01 - The Shaded Castle Entrance
1:30 - Golden Rune (5)
2:20 - ***Shaded Castle Ramparts***
3:15 - Golden Rune (6)
4:00 - Champion's Song Painting
6:00 - Smithing Stone (4)
8:40 - Smithing Stone (5)
9:30 - Golden Rune (6)
10:00 - Drawstring Fire Grease x2 & Smithing Stone (5)
11:00 - Beast Blood & Somber Smithing Stone (5)
11:35 - Neutralizing Boluses & Smithing Stone (5)
13:25 - Valkyrie's Prosthesis key item: Valkyrie's Prosthesis is required to advance the questline of Millicent
15:35 - Golden Rune (6)
16:40 - Path to ***Shaded Castle Inner Gate site of grace***
18:10 - Shortcut Unlock #1
20:00 - Perfume Bottle
20:20 - Stonesword Key
26:10 - Perfumer's Cookbook (2) recipe
28:05 - Gold Firefly x2
28:45 - Smithing Stone (5)
30:05 - Shortcut Unlock #2
30:40 - Elemer of the Briar: Marais Executioner's Sword & Briar Greatshield (Elemer of the Briar trophy)
We will now do the Leyndell - simply because we need to get Medallion key item from here in order to reach Mountaintop of the Giants. Why? Because of request from Volcano Manor NPC can be done there - and we need to make sure we can reach it first. So, on our way towards Leyndell! (this area is huuuuge).
Leyndell, Royal Capital
This is so far the biggest game area we will explore. The next video covers everything, you can find some legendary stuff, cool weapons and items, and Sewers entrance! I will note that in timestamps, but I will not enter them now. First, we need to complete Leyndell and beat 2 bosses there so we can progress towards Mountaintops. Also, for Sewers you need a key - after you enter them, visit Roundtable Hold and talk to Mohg red NPC in room behing the shop maiden on the left wing.
Also, Bolt of Gransax is a missable Legendary Arnament - be sure to grab it before you finish the end game boss, otherwise it will dissapear and you will either have to do NG+, or get it from someone in co-op if the drop it for you.
0:01 - Leyndell Royal Capital Entrance Route
0:22 - Gargoyle: Gargoyle's Great Axe
2:20 - Golden Seed x2
2:39 - Margit: Viridian Amber Medallion +1
5:40 - Draconic Tree Sentinel: Dragon Greatclaw & Dragonclaw Shield
7:25 - ***Capital Rampart site of grace***
8:04 - Path to ***East Capital Rampart site of grace***
11:30 - Golden Rune (10)
14:04 - Shortcut #1
15:25 - Golden Rune (9) x2, Smithing Stone (6)
16:58 - Golden Rune (12) & Imp Head (Wolf) & Stonesword Key
18:07 - Final jump from the roof path
21:10 - Red Branch Shortbow & Smithing Stone (6)
21:55 - Seedbed Curse key item & Perfume Bottle
23:51 - Upper-Class Robe armor
26:05 - Golden Rune (8)
27:40 - Somber Smithing Stone (5), Golden Rune (8) and (11)
32:10 - Gravel Stone x2 & Golden Rune (13)
33:40 - Golden Rune (10) & Hero's Rune (2)
34:25 - Stonesword Key
35:10 - Shorcut #2
36:50 - Path to ***Avenue Balcony site of grace***
37:48 - Erdtree: Lord's Rune
40:45 - Fan Daggers x8
41:20 - Arteria Leaf x2 & Imp Head (Corpse)
43:21 - Path to Mountaintops of the Giants Start
43:35 - Ash of War: Thunderbolt
45:30 - Path to ***Underground Roadside site of grace*** (Subterranean Shunning-Grounds area)
47:42 - Path to Shortcut #3, Crucible Knight Spear & Hero's Rune (5)
51:18 - Black Bow weapon
53:30 - Gravel Stone x1 & Stonesword Key
54:30 - Worm: Golden Seed x1
57:41 - Stonesword Key & Shortcut #3 - Back to Avenue Balcony site of grace
59:32 - Cracked Pot
1:00:50 - Path to *** site of grace*** & Lionel Armor Set (Helm, Armor, Gaunglets, Graves) & Deathbed Dress
1:01:30 - Omesmirk Mask
1:02:20 - Lord Ashes of War
1:04:05 - Guilty Hood armor
1:05:13 - String x4 & Erdsteel Dagger weapon & Shortcut #4
1:06:44 - Rune Arc & Gravel Stone & Path to ***West Capital Rampart site of grace***
1:11:03 - Cane Sword weapon & Door Lever
1:11:52 - Gravel Stone x3 & Stonesword Key
1:15:33 - Alberich's Armor Set & Vagram, Errant Invade from Volcano Manor: Raging Wolf Armor Set
1:18:50 - Flightless Bird Panting and ***Fortified Manor First Floor site of grace***
1:20:12 - Two Fingers Prayerbook key item
1:21:13 - Sancitified Whetblade key item & Hammer weapon & By My Sword gesture & Hero's Rune (1) & Coded Sword weapon & Seedbed Curse key item
1:23:49 - Stormhawk Axe weapon & ***Divine Bridge site of grace*** & Blessed Dew Talisman
1:26:23 - Golden Seed
1:27:45 - Gargoyle: Gargoyle's Halberd
1:29:45 - Smithing Stone (6)
1:33:50 - Godfrey, First Elden Lord (Godfrey First Elden Lord trophy): Talisman Pouch & ***Erdtree Sanctuary site of grace***
1:35:54 - Ritual Shield Talisman & Star Fist weapon
1:39:34 - Erdtree Bow weapon & Shortcut #5 & Celectial Dew
1:42:09 - Crucible Knight Spear & Barrier of Gold spell & Bolt of Gransax LEGENDARY ARNAMENT [Missable]
1:47:10 - Blessing of the Erdtree spell & ***Queen's Bedchamber site of grace***
1:49:18 - Margott, the Omen King: Margott's Great Rune & Remembrance of the Omen King (Margott the Omen King trophy) & Rold Medallion key item
1:53:02 - Path to Mountaintops of the Giants End
1:56:00 - Perfume Bottle
1:58:30 - Longhaft Axe weapon & Smithing Stone (6)
1:58:49 - Flamedrake Talisman +1
2:00:14 - ***Forbidden Lands site of grace***
This was huge! Now, we finally have access to first chunk of Mountaintop of the Giants. Let's go back a bit and explore Mt. Gelmir for now - we want to complet Volcano Manor and finish all NPC questlines there.
Volcano Manor
This dungeon can be reached in 3 ways. I will show you all 3, just note that if you beat the boss there you will miss Tanith and other questlines. The next video will cover them all, they will give you some cool armor sets, weapons and items, so I would says it's very worth doing them all.
0:01 - Volcano Manor Etrance 1/3 - From Raya (Schoolhouse Classroom site of grace)
2:53 - ***Subterranean Inquisition Chamber site of grace***
3:18 - Smithing Stone (4) and (6)
4:20 - Abductor Virgin (Wheel and Swinging Sickle): Inquisitor's Girandole weapon
6:22 - ***Abductor Virgin site of grace***
7:00 - Volcano Manor Etrance 2/3 - Volcano Manor Invitation from Liurnia region (Rya's Questline start)
7:56 - Rya's Necklace
9:09 - Volcano Manor Invitation
10:13 - Volcano Manor Etrance 3/3 - By foot from Altus Plains & Map of Mt. Gelmir
13:00 - Shop (Nomadic Warrior's Cookbook 20)
15:05 - Map of Mt. Gelmir
16:12 - Volcano Manor Entrance ***Volcano Manor site of grace***
19:08 - Invader Ghiza: Ghiza's Wheel weapon & Smithing Stone (6)
20:35 - Tanith's Questline Start: Drawing-Room Key
21:35 - Perfume Bottle and Invisible Wall
22:40 - Recusant Finger & Letter from Volcano Manor
25:10 - Old Knight Istvan Invader: Scaled Armor Set
27:16 - Letter from Volcano Manor 2 (Magma Shot spell reward)
28:10 - Rileigh the Idle Invader: Crepus's Vial
28:25 - You can buy Ash of War from Bernahl here
30:40 - Red Letter (Serpentbone Blade weapon reward)
32:40 - Juno Hoslow, Knight of Blood Invader Letter Location
33:00 - Letter to Bernahl
33:42 - Rya's in Serpent Form (Zaraya)
35:29 - Juno Hoslow, Knight of Blood: Hoslow's Petal Whip & Hoslow's Armor Set
39:00 - Talk to Everyone in Volcano Manor (Gelmir's Fury spell)
40:20 - Talk to Tanith (Taker's Cameo reward) ***Audience Pathway site of grace***
41:10 - Nomadic Warrior's Cookbook (21) & Invisible Wall: Depraved Perfumer Carmaan Ashes
43:07 - Bloodhound Claws weapon
44:35 - ***Prison Town Church site of grace***
45:21 - Golden Rune (5) and (9), Somber Smithing Stone (5) and Smithing Stone (5)
46:49 - Stonesword Key, Smithing Stone (6), Golden Rune (9) and Smoldering Shield and Erdtree Seal
52:11 - Stonesword Key Doors: Crimson Amber Medallion +1
54:28 - Albinauric Staff & Albinauric Mask & Golden Rune (10)
58:04 - Path to ***Guest Hall site of grace***
1:01:34 - Golden Rune (9), Smithing Stone (6), Somber Smithing Stone (6)
1:06:22 - Dragon fight: Dragon Heart, Smithing Stone (7)
1:10:43 - Somber Smithing Stone (5) and Shortcut #1 (Raising the bridge)
1:12:09 - Godskin Noble: Godskin Sticher and Noble Presence Ash of War (Godskin Noble trophy)
1:13:50 - ***Temple of Eiglay site of grace*** & Serpent's Amnion
1:14:15 - Golden Rune (9) and (12)
1:17:33 - Missionary's Cookbook (6)
1:19:38 - Somber Smithing Stone (5) & path towards Shortcut #2
1:22:34 - Stonesword Key & Somber Smithing Stone (6) & Commoner's Headbad
1:25:30 - Man-Serpent Ashes
1:28:40 - Teleport
1:28:52 - Stonesword Key Doors
1:29:18 - Dagger Talisman & Rune Arc
1:30:00 - Ash of War: Royal Knight's Resolve & Shortcut to beginning of the Manor (Patches NPC)
1:32:25 - Seedbed Curse
1:32:55 - Somber Smithing Stone (7)
1:33:28 - Audience Pathway site of grace: Serpent-Hunter
1:33:51 - God-Devouring Serpent
1:34:55 - Rykard Lord of Blasphemy: Rykard's Great Rune, Rememberance of the Blasphemous (Shardbearer Rykard trophy)
1:36:30 - Tanith's Questline Progress & My Thanks Gesture
1:38:30 - Kill Tanith and Defeat her Knight: Aspect of the Crucible: Breath spell & Consort Armor Set
With this done, we can either finish exploring Mt. Gelmir area, or we can continue to some other locations we skipped back at some points. I will go to Lake of Rot now, and reach Moonlight Altar where we can finish Renni's Questline for Age of Stars trophy - with that, we have everything ready to trigger this endings after final boss etc.
Lake of Rot & Moonlight Altar
Prepare for scarlet rot poison area, and prepare for finally reaching that top part of southwestern Liurnia. Passing through this unlocks few more trophies and it will finally end the Age of Stars questline until the end of the game - by doing this you will unlock the option to summon Renni at the end of the game, thus triggering Age of Stars ending. Let's do it!
0:01 - Map: Lake of Rot
0:36 - Aeonian Butterfly x1 & Somber Smithing Stone (8) and (7) & Golden Rune (9)
2:39 - Pillar #1 & Rot Grease
3:08 - Pillar #2 & Black-Key Bolt & Somber Smithing Stone (7)
5:00 - Nomadic Warrior's Cookbook (22)
5:45 - Pillar #3
6:40 - Somber Smithing Stone (6)
7:04 - Pillar #4 & Golden Rune (7), (10)
8:50 - Somber Smithing Stone (8)
9:31 - Immunizing Horn Charm +1 & Mushroom Crown helmet
11:45 - Pillar #5 & Dragonkin Soldier: Dragonscale Blade
15:19 - Alabaster Lord's Sword & Somber Smithing Stone (9)
17:57 - Path to ***Grand Cloister site of grace***
20:35 - Golden Rune (10)
22:20 - Smithing Stone (6) and (7), Golden Rune (10)
24:05 - Worm boss: Golden Seed
26:50 - Ghost Gloverwort (9)
28:00 - Smithing Stone (5) & Fan Daggers x8
29:30 - Scorpion's Stinger weapon
30:30 - Coffin teleport to boss area
32:41 - Astel, Naturalborn of the Void: Remembrence of the Naturalborn (Astel, Naturalborn of the Void trophy)
35:10 - Reaching Moonlight Altar
37:15 - Renni's Questline End (Almost End): Dark Moon Greatsword
40:56 - Ringleader's Evergaul - Alecto, Black Knige Ringleader: Black Knight Tiche LEGENDARY ASHES
There is also a tower on the Altar you can explore to get another Legendary Incantation. It's not covered in the video, but have that in mind if you want to finish the Moonlight Altar part. You can also defeat the dragon here if you want to. Let's move to yet another undeground area!
Deeproot Depths Walkthrough & Lichdragon Fortissax Trophy [Missable]
Be very careful when you reach the end of Deeproot Depths! Choosing the first option when talking to Fia will lock you out of Lichdragon trophy! Maybe backup your save before the boss fight before that, just to be sure. We can also find Legendary spell in here. Also, next video will show you the whole progress for Fia's questline.
0:01 - Fia's questline start: Baldchin's Blessing
1:49 - Fia's questline: Talk to her after each boss fight and exhaust all options
3:28 - Fia's questline: If you do Rogier's questline, she will give you Knifeprint Clue
4:58 - D's questline: At some point D with also visit Roundtable Hold, you can talk to him (I’ve found him after Godrick)
5:40 - Tibia Mariner: Deathroot & Skeletal Militiaman Ashes
7:19 - D's questline: Talk to him so he can mark you a teleport point towards the beast which you need to give Deathroot
8:32 - D's questline: Find Gurranq in Bestial Sanctum (use teleport to avoid going there by foot) and give hime your Deathroot. He rewards you for additional Deathroots as well
9:46 - Fia's questline: After beating Raya Academy and you teleport towards northeast from there, she will give you Weathered Dagger if D is here
11:20 - Fia's questline: Give D the Weathered Dagger
11:47 - Fia's questline: Find a loot D's corpse, Fia will leave. We can now find and explore Deeproot Depths
13:15 - Deeproot Depths Entrance, ***Great Waterfall Crest site of grace***
14:35 - Erdtree: Staff of the Avatar weapon
16:10 - Ash of War: Golden Land
16:59 - Smithing Stone (6), Numben's Rune x5, Rune Arc x5, Somber Smithing Stone (6) & Path to Elden Stars Legendary Incantation
22:25 - Holy Grease
23:50 - Smithing Stone (4)
24:15 - Golden Rune (5)
25:22 - Smithing Stone (4) & Golden Rune (6)
26:20 - Path towards ***Deeproot Depths site of grace***
28:23 - Ghost Gravewort (4) & Map: Deeproot Depths
31:20 - Bear: Prince of Death's Cyst
33:35 - Rune Arc, Smithing Stone (6)
34:20 - Ash of War: Vacuum Slice
36:00 - Path towards ***The Nameless Eternal City
38:32 - Golden Runes, Smithing Stones & Coffin (you can enter one and enter Nokstella from here)
39:40 - Smithing Stone (5), (6) & Prince of Death's Staff weapon
41:31 - Arteria Leaf & Smithing Stone (7) & Ghost Glovewort (5)
43:00 - Lightning Greatbolt x6
43:50 - Somber Smithing Stone (6) & Mausoleum Soldier Ashes
45:30 - Crucible Knight Siluria: Siluria's Tree weapon
47:30 - Ghost Glovewort (7) & Crucible Tree Set (Helm, Armor, Gaunglets, Greaves)
48:55 - Ghost Glovewort (6) & Stonesword Key
50:00 - Somber Smithing Stone (7)
51:47 - Somber Smithing Stone (6) & Walking Mausoleum
54:45 - Bear
57:05 - Somber Smithing Stone (7)
58:05 - Somber Smithing Stone (7) & Smithing Stone (6)
59:35 - Ghost Glovewort (7) & Somber Smithing Stone (7)
1:02:44 - Path towards ***Across the Roots site of grace***
1:04:36 - Fia's Champions Fight: Fia's Mist spell
1:07:37 - Talk to Fia: Be very careful! If you choose the first answer you will miss this trophy!
1:10:16 - Talk to Fia: Teleport and talk to her until you find her sleeping
1:10:54 - Lichdragon Fortissax: Remembrance of the Lichdragon (Lichdragon Fortissax trophy) [Missable]
1:13:55 - Mending Rune of the Death-Prince key item
My plan is to go to Sewer below the Lyndel Royal Capital next. Teleport to Roundtable Hold and talk to Mohg in the room past the shop to get The Sewer Gaol Key (to get it you must've entered Sewers from Leyndell first). Let's go there!
Subterranean Shunning-Grounds, Leyndell Catacombs
This is where you can reach one of the endings (Frenzied Flame), but DO NOT OPEN the doors at the bottom of the area as that will block you from Elden Lord ending at the end during a single playthrough using the save backup method. Just be careful about that, I will just reach the site of grace near these doors and stop there for now.
0:01 - Subterranean Shunning-Grounds Entrance
0:32 - Rune Arc & Path to ***Underground Roadside site of grace***
2:16 - Sewer-Ghaol Key
2:27 - Bloodsoaked Manchettes & Bloodsoaked Mask
4:09 - Somber Smithing Stone (6) & Smithing Stone (7) & Shadow Bait spell + Shortcut #1
8:14 - Somber Smithing Stone (8), Smithing Stone (7) & Shortcut #2
14:02 - From Shortcut #2: Ghost Glovewort (6), Smithing Stone (7)
17:31 - Stonesword Key
18:49 - Rune Arc, Lost Ashes of War, Dung Eater NPC (Free him if you got the key from his Invader form in Roundhouse Table. You can continue his qustline if you prefer, I will stick to exploring sewers
22:30 - Grace Mimic
23:25 - Somber Smithing Stone (6) & Nomad Ashes
25:10 - Omen Bairn, Golden Centipede x2, Path to Shortcut #3
28:55 - Golden Rune (10) & Shortcut #4
30:45 - Golden Runes, Smithing Stone (7), Eye of Yelough, Smithing Stone (8) & Shortcut #5 (the doors!)
37:50 - From Shortcut #5: Ritual Pot, Path to ***Forsaken Depths site of grace***
40:00 - Mohg, the Omen: Bloodflame Talons (Mohg, the Omen trophy)
42:25 - ***Cathedral of the Forsaken site of grace*** & Erdtree's Favor +1 (one of best talismans!)
43:27 - Lord of Frenzied Flame Ending path [Do not go through the doors at the end naked!]
44:30 - Let enemy destory object: Eye of Yelough x5
44:59 - Golden Rune (11) & Frenzied's Cookbook (2)
45:50 - Inescapable Frenzy spell
46:35 - Fingerprint Stone Shield
47:10 - Let enemy destory object: Note - Miquella's Needle
48:22 - ***Frenzied Flame Proscription site of grace***
49:25 - Invisible wall: Rune Arc & ***Root Facing Cliffs site of grace*** (leads to deeproot depths from above)
50:10 - Path towards ***Leyndell Catacombs site of grace*** dungeon (Smithing Stone 7, Somber Smithing Stone (7) x2, Mohg's Shackle on the way)
52:47 - Invisible walls x2: Haligdrake Talisman +1
53:48 - Lever for Shortcut #6 (opens staircase to Subterranean Shunning-Grounds)
55:44 - Ghost Glovewort (6) & Entering the maze path
57:30 - Crucible Scale Talisman
58:30 - Ghost Glovewort (9)
59:20 - Ghost Glovewort (8)
1:00:03 - Decoy Boss, Ghost Glovewort (8)
1:01:37 - Ghost Glovewort (8) x3
1:05:23 - Lever path (finaly)
1:07:12 - Esgar, Priest of Blood: Lord of Blood's Exultation: Lord of Blood's Exultation
With this out of your way, you can now proceed to Castle Sol on the first snowy area northeast from the Altus region.
Castle Sol
This location is important if you want to reach west snowy area as you need the other half of the Haligtree Secret Medallion. Also, you can find Eclipse Shotel legendary arnament in this area (needed for a trophy). If you need to explore some optional dungeons first, here is the topic for that:
Elden Ring - Mountaintop of the Giants Optional Dungeons
0:01 - Castle Sol Entrance, ***Castle Sol site of grace***
1:53 - Bell Monument
4:17 - 2 Beasts at entrance: Somber Smithing Stone (7) x2
8:00 - Golden Rune (10)
9:14 - Furlcalling Finger Remedy
9:55 - Nascent Butterfly
10:20 - Fan Daggers x5
11:00 - Golden Rune (10)
12:00 - Smithing Stone (6)
12:30 - "Sorcerer" Painting & Shortcut #1
12:50 - Smithing Stone (5)
14:25 - Stormhawk Axe weapon
15:30 - Path to *** site of grace***
16:32 - Golden Rune (10)
17:30 - Smithing Stone (5) & Golden Rune (9) & Stonesword Key
20:20 - Somber Smithing Stone (8)
21:01 - Eclipse Shotel weapon LEGENDARY ARNAMENT
21:30 - Rune Arc & Smithing Stone (7)
24:00 - Cerulean Amber Medallion +1
25:45 - Smithing Stone (6) & Shorcut #2
28:55 - Commander Niall: Veteran's Prosthesis weapon (Commander Niall trophy)
30:55 - Haligtree Secret Medallion (Left)
Since you probably have both Haligtree Secret Medallion parts, it's time to explore the west snowy mountaintops. I have just the video that will show you how to reach it, where to find medallion parts and all you need to see.
Reaching West Mountaintops area via the Great Bridge
Via this area you can reach Haligtree where 2 trophy optional bosses awaits; also there are couple of dungeons and some neat rewards. Let's first get there.
0:01 - Haligtree Secret Medallion (Right) - Latenna Questline
1:12 - Village of the Albinaurics and Haligtree Secret Medallion (Right)
2:35 - Haligtree Secret Medallion (Left) - After Commander Niall
3:36 - Reach Mountaintops West via Grand Lift of Rold
4:40 - Hidden Path to the Haligtree
5:45 - Warming Stone x2
7:45 - Freezing Grease x1
11:00 - Grave Glovewort (9)
11:30 - ***Hidden path to Haligree site of grace*** - Mountaintops West
With this out of your way you can start exploring West Mountaintops of the Giants area.
West Mountaintops of the Giants
For optional dungeons check the next topic:
Elden Ring - Mountaintop of the Giants Optional Dungeons
For the rest, well, let's go and reach the Mohgwyn Palace as we can now use the teleport in this west snowy mountains to take us there.
Mohgwyn Palace
The next video will show you both way to reach the mentioned palace; one includes Varre NPC (the first masked NPC in the game), the other is just using the teleport.
0:01 - White-Faced Varre NPC Quest start
2:54 - White-Faced Varre at Rose Church: Festering Bloody Finger x5
4:05 - Invade 3 times using Festering Bloody Fingers (you don't have to win), and he will give you Lord of Blood's Favor
5:12 - Soak Lord of Blood's Favor inside Church of Inhibition on the northern Liurnia (prepare for some nasty magic along the way)
5:32 - Bloody Finger & Pureblood Knight's Medal (Use to teleport to Mohgwyn Palace)
7:12 - Alternative path towards Mohgwyn Palace
8:25 - Golden Rune (11)
8:35 - ***Palace Approach Ledge-Road site of grace***
8:58 - Golden Rune (11)
10:00 - Bloodrose x5 & Smithing Stone (6)
10:35 - Nomadic Warrior's Cookbook (24) & Ghost Glovewort (8)
12:50 - Rot Grease x3
13:00 - Bloodrose x5
13:10 - Nameles White Mask Invader: White Mask helm, War Surgeon Armor set
14:15 - Arteria Leaf x4
15:20 - Holy Grease
15:48 - Ghost Glovewort (9) & Haligdrake Talisman +2 & Stonesword key
16:05 - Golden Rune (13)
16:55 - Hero's Rune (4)
17:30 - Clarifying Boluses
17:58 - Hero's Rune (3)
18:20 - Ash of War: Blood Tax & Somber Smithing Stone (9)
19:00 - Ghost Glovewort (8) & Swarm of Flies spell
19:30 - Smithing Stone (6) & Golden Rune (13)
19:55 - Golden Rune (12) & Smithing Stone (8)
20:30 - Smithing Stone (8) & Rune Arc
21:08 - Ghost Glovewort (9) & Map Mohgwyn Palace
22:01 - *** site of grace***
22:09 - Nascent Butterfly & Sacramental Bud
23:37 - Smithing Stone (7)
23:15 - Numen's Rune
23:25 - Boluses and Stonesword Key
23:47 - Shop Merchant
26:50 - Lord's Rune & Smithing Stone (8) & Ghost Glovewort (9)
29:20 - Great Ghost Glovewort
29:30 - Path to *** site of grace***
30:35 - Invader White Mask Varre: Varre's Bouquet
33:55 - Golden Rune (13) & Somber Ancient Dragon Smithing Stone!
35:55 - Path to Boss
38:08 - Mohg, Lord of Blood: Mohg's Great Rune & Remembrance of the Blood Lord (Shardbearer Morg trophy)
It's time to go a bit north in the west snowy area and reach Miquella's Haligtree and Elphael (where the strongest Elden Ring boss awaits).
Miquella's Haligtree
We start from the top; that is Miquella's Haligtree. You will need to solve a Evergaul at northern point of west snowy area first (inside the Ordina, Liturgical Town).
0:01 - Ordina, Liturgical Town, Evergaul Entrance
0:36 - Switch #1
1:44 - Switch #2
2:20 - Switch #3
4:00 - Switch #4
5:13 - Path to ***Haligtree Canopy site of grace***
6:25 - Miquella's Haligtree start
12:44 - Couple of Items
14:50 - Golden Rune (13)
15:37 - Numen's Rune, Flaming bolt x10
17:30 - Lost Ashes of War
18:20 - Oracle Envoy Ashes
18:40 - Path to *** site of grace***
19:40 - Golden Rune (10)
20:20 - Pearldrake Talisman +2
21:30 - Smithing Stone (8)
24:15 - Golden Rune (13)
25:25 - Ancient Dragon Smithing Stone
27:25 - Somber Smithing Stone (8), Golden Rune (12) & ***Haligtree Town Plazza site of grace***
28:42 - Smithing Stone (6), Somber Smithing Stone (9)
31:20 - Golden Rune (10)
32:00 - Smithing Stone (6), Golden Rune (12) & Viridian Amber Medallion +2
34:40 - Sacramental Bud
36:45 - Hero's Rune (4)
37:35 - Smithing Stone (7), (8), Shortcut elevator
39:50 - Loretta, Knight of the Haligtree: Loretta's War Sickle weapon (Loretta Knight of the Haligtree trophy)
41:20 - ***Haligtree's Promenade site of grace***
You are almost at the end. Not! There is still some way to go, so let's just continue down the line.
Elphael
Welcome to the relatively easy dungeon, but the game's strongest boss. You might want to grind a bit and respec if needed; the video will show you my strategy and a grinding point as well, so you can folow it and do as I did. Melania is really, really frustrating boss, but doable if you just stomp her.
This area holds Cleanrot Knight Finlay Legendary Ashes, Marika's Soreseal Legendary Talisman and Dragoncrest Greatshield Talisman Legendary Talisman, which you need for a trophy.
0:01 - After Miquella's Haligtree
1:10 - Ancient Dragon Smithing Stone
1:40 - Path to ***Prayer Room site of grace***
3:16 - Golden Rune (12)
4:10 - Miquellan Knight's Sword
4:55 - Smithing Stone (8)
5:57 - Lightning Greatbolt x5
6:55 - Stonesword Key Doors: Triple Rigns of Light spell
8:20 - Smithing Stone (7)
8:55 - Path towards Cleanrot Knight Finlay LEGENDARY ASHES
10:50 - Somber Ancient Dragon Smithing Stone
11:40 - Seedbed Curse
12:11 - From Cleanrot Knight Finlay: Golden Rune (10) & Smithing Stone (7)
13:40 - Old Fang x5
14:45 - Lord's Rune & Path towards ***Elphael Inner Wall site of grace***
18:35 - Putrid Avatar: Lord's Rune & Smithing Stone (6)
20:42 - Path from Prayer Room site of grace: Putrid Avatar - Rotten Staff weapon & Somber Ancient Dragon Smithing Stone
22:50 - Numen's Rune
23:30 - Somber Smithing Stone (9)
25:05 - Seedbed Curse
26:00 - Somber Smithing Stone (9) & Pickled Turtle Neck
28:00 - Path to Stonesword Key Doors: Marika's Soreseal LEGENDARY TALISMAN
30:05 - Path towards ***Elphael Inner Wall site of grace***
33:40 - Haligtree Knight Helm
35:00 - Smithing Stone (8) & Haligtree Soldier Ashes
38:00 - Rotten Crystal Sword weapon
38:20 - Hero's Rune (5)
38:50 - Path to ***Drainage Channel site of grace***
42:25 - Grave Ghost Gravewort & Worm: Golden Seed
45:15 - Dragoncrest Greatshield Talisman LEGENDARY TALISMAN
46:28 - Nascent Butterfly
47:10 - Hero's Rune (5)
49:30 - Ghost Glovewort (7), (8), (9), Numen's Rune & Ghost-Glovewort Picker's Bell Bearing (3)
50:40 - Path towards ***Haligtree Roots site of grace***
51:25 - Traveler's Armor Set & Shortcut #1
52:15 - Malenia Setup & Farming Souls Setup Overview: Use Radahn's Remembrance in Roundhouse Table to get Starscourge Greatsword and max it out. For farming you can add Gold Scarab instead of Radagon’s Soreseal
52:53 - Gold-Pickled Fowl Foot: Combine Gold Scarab with
53:01 - Farming Method: On your way towards Mohgwyn Palace you can use this spot to farm - L2 twice when you dual wield plus Souls up buffs will get you high soon
55:20 - Malenia, Blade of Miquella Fight Start
57:35 - Malenia Phase 1
1:00:25 - Malenia Phase 2: Malenia's Great Rune, Remembrance of the Rot Goddess (Shardbearer Malenia trophy)
Congrats! The rest of the game is easy comparing to Melania. Let's go and finish what we need.
Since I didn't get all legendary Incantations through this progress guide, you can follow the video and find them all, now it's a good point to do so.
All Legendary Sorceries and Incantations
Since I didn't get all legendary Incantations through this progress guide, you can follow the video and find them all, now it's a good point to do so. Nothing from this list is missable (unless you enter NG+ after the final boss).
0:01 - Liurnia (Malefactor's Evergaol): Adan, Thief of Fire: Flame of the Fell God
1:55 - Mountaintop of the Giants (Heretical Rise): Founding Rain of Stars
6:30 - Deeproot Depths: Elden Stars
8:56 - Liurnia (Moonlight Altar, Chelona's Rise): Ranni’s Dark Moon
12:15 - Mt. Gelmir: Comet Azur
17:15 - Caelid (Sellia Hideaway cave): Stars of Ruin
21:25 - Caelid: Greyoll’s Roar
Congrats on the Legendary Sorceries and Incantations trophy!
We will now proceed to the Foot of the Gorge site of grace on the far east snowy mountains where the Fire Giant awaits. After beating the Fire Giant you will come to first point of no return. More details below.
Fire Giant and Reaching Crumbling Farum Azula (Soft Point of no return)
If you decide to light a flame inside the Forge after the Fire Giant note that this is the first point of no return as some NPCs inside Roudtable Hold will be dead and some questline inaccessible. With that in mind, let's go.
0:01 - Reaching Fire Giant
0:35 - Fire Giant Phase 1
4:35 - Fire Giant Phase 2: Remembrance of the Fire Giant (Fire Giant trophy)
7:25 - Path to ***Forge of the Giants site of grace***
8:55 - Point of No Return #1: Commit a Cardial Sin (Note - There’s an alternative to this scenario which requires you to find the Flame of Frenzy and the Three Fingers) - Erdtree Aflame trophy
12:40 - Crumbling Farum Azula, path to ***Crumbling Beat Grave site of grace***
By completing this part you can now explore the Crumbling Farum Azula - game's last story dungeon.
Crumbling Farum Azula
By finishing this dungeon you will get to the next point of no return where Leyndell is no longer accessible for most of its parts, and more NPC questlines are over.
0:01 - Alternate entrance to Crumbling Farum Azula (from the Four Belfries): Perldrake Talisman
1:10 - Regular Crumbling Farum Azula Entrance
1:50 - Smithing Stone (8)
2:10 - Golden Rune (9)
2:35 - Path to ***Crumbling Beast Grave site of grace***
4:31 - Dragon #1: Ancient Dragon Smithing Stone
7:45 - Smithing Stone (8) 2 & Path to ***Crumbling Beast Grave Depths site of grace***
9:00 - Smithing Stone (7), Gravel Stone x3, Great Grave Glovewort, Smithing Stone (6)
11:50 - Golden Rune (12)
12:40 - Ancient Dragon Prayerbook
13:55 - Somberstone Miner's Bell Bearing (4) & Path to ***Tempest Facing Balcony site of grace***
14:50 - Smithing Stone (8) & Dragon #2
18:45 - Somber Smithing Stone (9)
19:40 - Smithing Stone (8)
21:00 - Fulgurbloom
21:25 - Gravel Stone x5
23:25 - Glovewort Picker's Bell Bearing (3)
25:30 - From Tempest Facing Balcony: Golden Rune (9), Somber Smithing Stone (7), Gravel Stone x3
26:50 - Path to ***Dragon Temple site of grace***
27:15 - From Tempest Facing Balcony: Golden Rune (10), Great Grave Glovewort
29:20 - From Tempest Facing Balcony: Golden Rune (12), Rune Arc, Azula Beastman Ashes, Somber Smithing Stone (9)
31:30 - Path to ***Dragon Temple Transept site of grace***
32:07 - Godskin Duo: Smithing-Stone Miner's Bell Bearing (4), Ash of War: Black Flame Tornado (Godskin Duo trophy) & ***Dragon Temple Altar site of grace***
34:25 - Golden Rune (12)
35:50 - Golden Rune (11)
37:30 - Hero's Rune (5)
38:35 - Some Items, Golden Rune (12) & Dragoncrest Shield Talisman +2
41:10 - Crucible Knight & Path to ***Dragon Table Rooftop site of grace***
45:10 - From Dragon Temple: Golden Rune (11), Smithing Stone (6) & Stonesword Key
48:30 - Ancient Dragon Smithing Stone
50:45 - Somber Smithing Stone (9) & Stonesword Key Doors - Path to ***Dragon Temple Lift site of grace***
51:55 - Lord's Rune, Nascent Butterfly x2, Smithing Stone (7), Golden Rune (12)
53:30 - Golden Seed, Rune Arc, Smithing Stone (8)
54:05 - Golden Lighting Fortification spell & Dragon #3: Gravel Stone x3
56:55 - Alexander, Warrior Jar NPC quest end: Shard of Alexander, Alexander's Innards
59:30 - Ancient Dragon Apostle's Cookbook (4)
1:01:15 - Somber Smithing Stone (8), Smithing Stone (8)
1:02:00 - From Dragon Temple Rooftop: Drake Knight Armor Set
1:03:40 - From Dragon Temple Rooftop: Dragon #4: Ancient Dragon Smithing Stone
1:06:05 - Somber Ancient Dragon Smithing Stone
1:06:20 - Golden Seed & Smithing Stone (7)
1:07:20 - Dragon Towershield & Boltdrake Talisman +2
1:11:25 - From Dragon Temple Rooftop: Somberstone Miner's Bell Bearing (5), ***Beside the Great Bridge site of grace***
1:14:40 - Path to Dragonlord Placidusax: Remembrance of the Dragonlord (Dragonlord Placidusax trophy)
1:20:55 - Recusant Bernahl: Blasphemous Claw, Devourer's Scepter, Beast Champion Armor Set, Old Lord's Talisman LEGENDARY TALISMAN
1:24:47 - Legendary Arnaments Trophy
1:25:15 - Malformed Dragon: Malformed Dragon Armor Set
1:26:50 - Maliketh the Black Blade: Remembrance of the Black Blade (Maliketh the Black Blade trophy)
Only small part of the game remains! Check if you miss some trophies apart from 3 endings and one for legendary talisman (the last talisman is in the next area where we will finish the game).
Leyndell Ashen Capital
We are back to the Capital, but this time it's modified. It's burned to the ground, which means you can't really reach most of it anymore. Sewers and reaching the doors for the Frenzied ending are still reachable, but the rest is not.
Collect Erdtree+s Favor + 2, which should be your last legendary talisman in the game. If you only miss endings trophies and story ones for remaining boss fights - the platinum will soon be yours.
0:01 - Leyndel Ashen Capital start: Erdtree's Favor +2 (Legendary Talismans trophy)
1:58 - Leyndell, Capital of Ash site of grace: Tarnished Golden Sunflower & Golden Sunflower
2:35 - Somber Ancient Dragon Smithing Stone
4:00 - Crimson Amber Medallion +2
4:37 - Rune Arc & Sir Gideon Ofnir, the All-Knowing: Scepter of the All-Knowing & All-Knowing Armor Set
7:00 - ***Erdtree Sanctuary site of grace***
7:15 - Erdtree Heal spell & ***Queen's Bedchamber site of grace***
10:45 - Godfrey, First Elden Lord: Remembrance of Hoarax Loux (Hoarah Loux the Warrior Trophy)
14:35 - ***Elder Tree site of grace***
15:04 - Radagon of the Golden Order & Elden Beast: Elden Remembrance
21:00 - Backup Your SAVE!!! on Fractured Marika site of grace
21:22 - Lord of Frenzied Flame Ending. Start from Frenzied Flame Proscription inside Subterranean Shunning-Grounds. It's important that you didn't opened these doors beforehand - as it will block you from one of the endings
26:10 - Elden Lord Ending. Download your save from USB/Cloud and this time directly end the game from Fractured Marika (Mend the Elden Ring)
28:35 - Age of the Stars Ending. Download your save from USB/Cloud and this time inspect blue summon on the ground (end of Renni's Questline)
This guide is done!
I hope it served you well along the way, and I hope you can share it and help me in that manner. Thx for sticking with it!
Game Review
Latest Trophy Guides
Latest Reviews
Leave a comment
Please Log in to leave a commentComments
No comments available!